
 |
| Hell Yeah!!! |
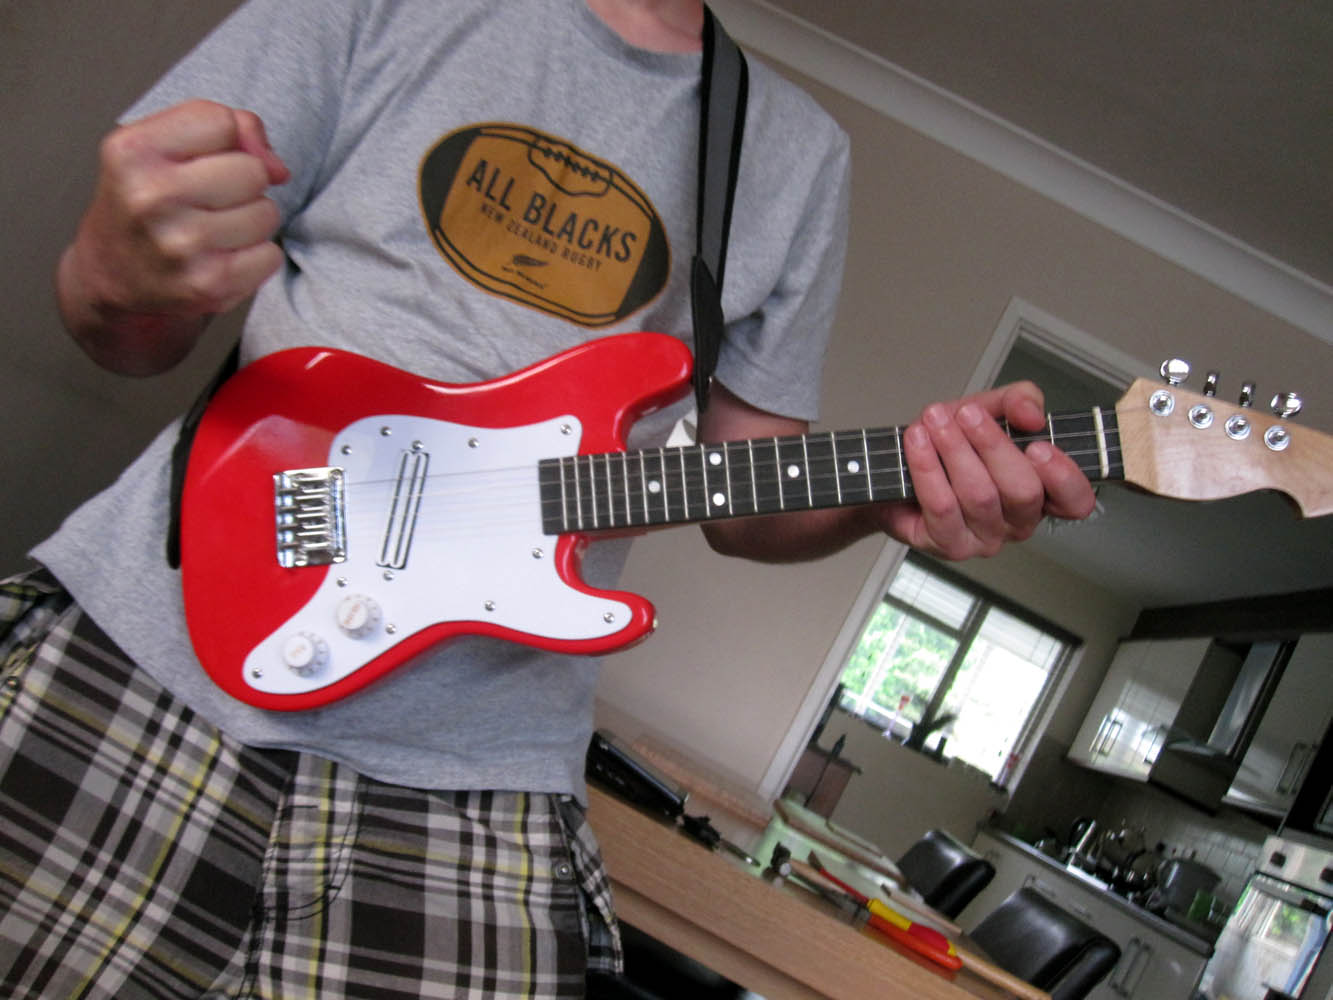
Regular readers of this blog will know that I’m building an electric ukulele… It’s taken a long, long time. All along the way I’ve posted progress updates and shared with you the highs and the lows. Well, I’m coming to the end of my wonderful journey. This won’t be my last post on the subject, but it will probably be the last on the actual build itself. My last series of updates revolved around some frustrations I was having with the paint job and of course I’d forgotten to fit the fret markers! I bet you’re wondering how it all turned out. Read on…
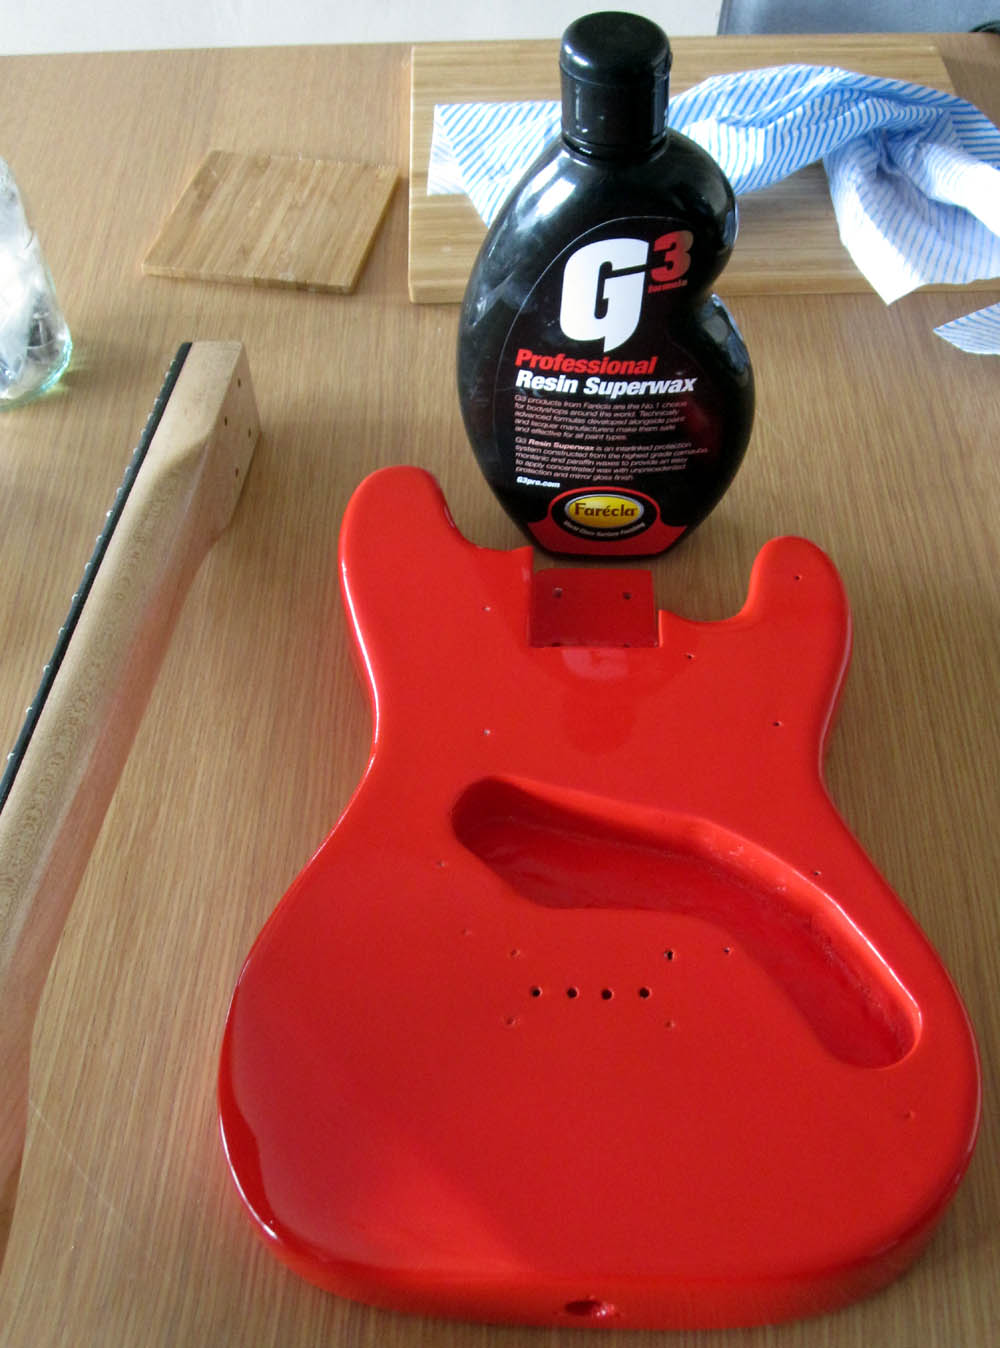 |
| First a few words on the paint job. I’m still not happy that I’ve got this sussed. I painted; I lacquered; and I left it hanging to cure for about a week and a half. Every time I wen’t back to it it seemed a little smoother and a little harder. I sprayed many layers, wet-sanding between each EXCEPT the final paint AND the final lacquer. I think you are meant to sand both of these, but I didn’t want to lose that finish. The result was a small amount of orange peel that has actually been fading over time, but is still there. One thing that I want to call out from an earlier round of smoothing was that I used T-Cut. Whilst researching my polish I discovered that T-Cut contains ammonia that can soften the paint. I didn’t realise it at the time, but it did that for me. I remember getting these strange fingerprints for no apparent reason which I had to work out. I bet it was the T-Cut! DON’T USE IT! My final step was to polish with some car polish. I used the G3 Superwax in the picture. It’s shiny, but prone to fingerprints etc. and at the moment is needing quite a bit of rebuffing to keep its gleam. I’m expecting over time that this will settle down. |
 |
| Here’s the polished end product. |
 |
| I intended to leave everything hanging to cure for a couple more days, but I couldn’t resist starting to put it together. Here you can see that I’ve attached the neck and body and the tuners to the head. I left it stood on a stand overnight and was horrified to find that it had left some small marks on the lacquer. I re-polished and will put them down to experience. I’m going to be a lot more careful with this uke from here on in until I can be sure that the paint has cured |
 |
| Next up was to wire the electrics in. See here that I’ve put in some wire to connect the bridge ground. There is a hole leading from one of the bridge screw holes down into the cavity. I’ve lined the cavity with copper foil and even stuck some under the metal of the wire where the bridge will be, holding the tip of the exposed wire with a small patch of copper. |
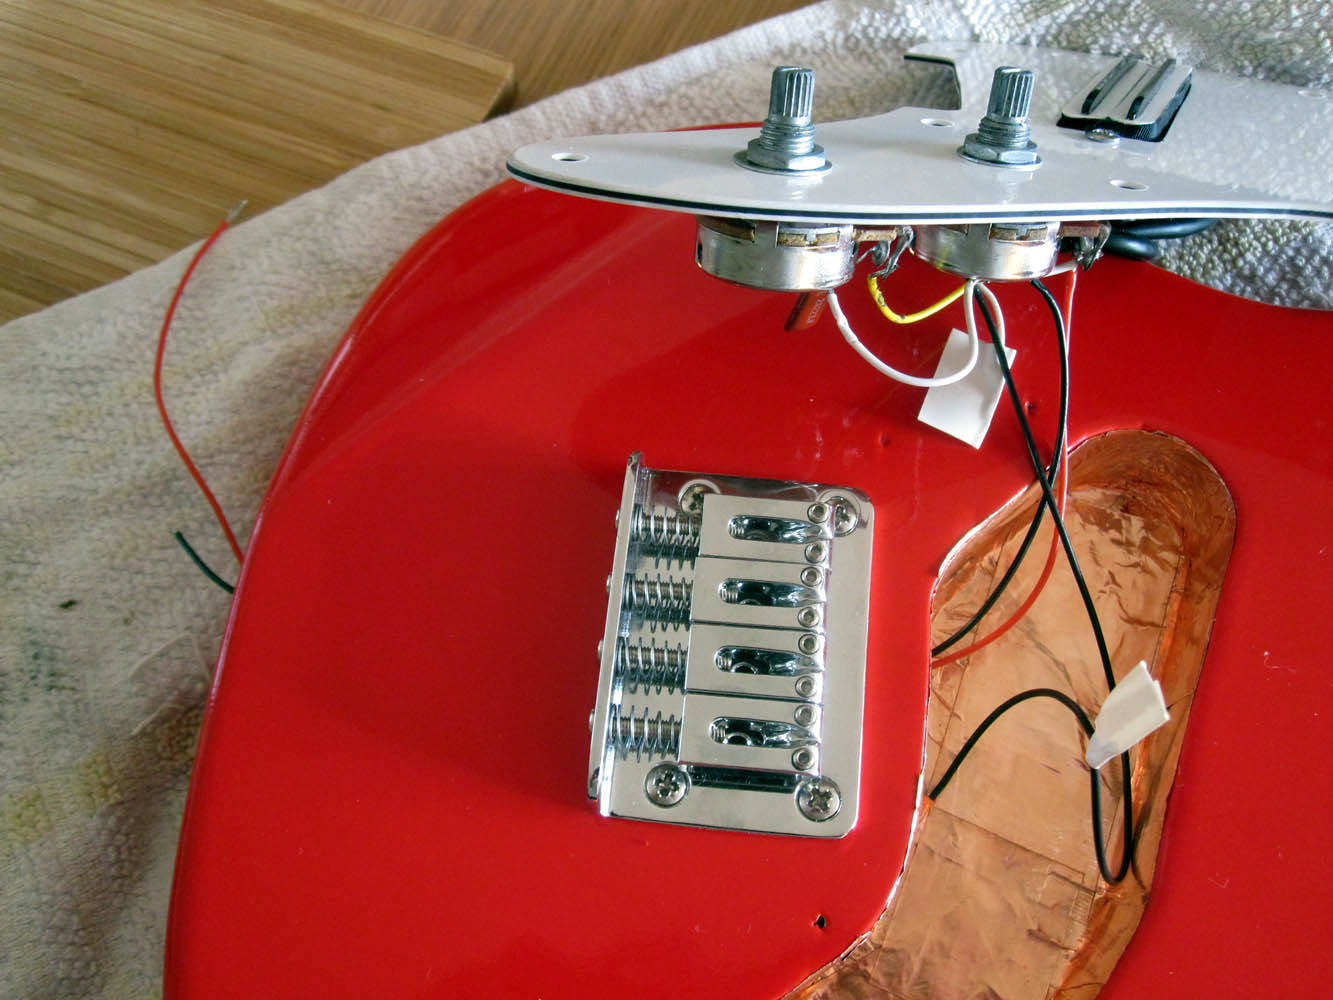 |
| I fitted the bridge and checked the bridge and ground wire with my multimeter continuity buzzer. I had intended to fit a screw and then use this as a base to solder the bridge grounds from the bridge and scratch plate together. In the end I just wound them together and taped. Then I fed the wires through the hole I created for the jack pin. |
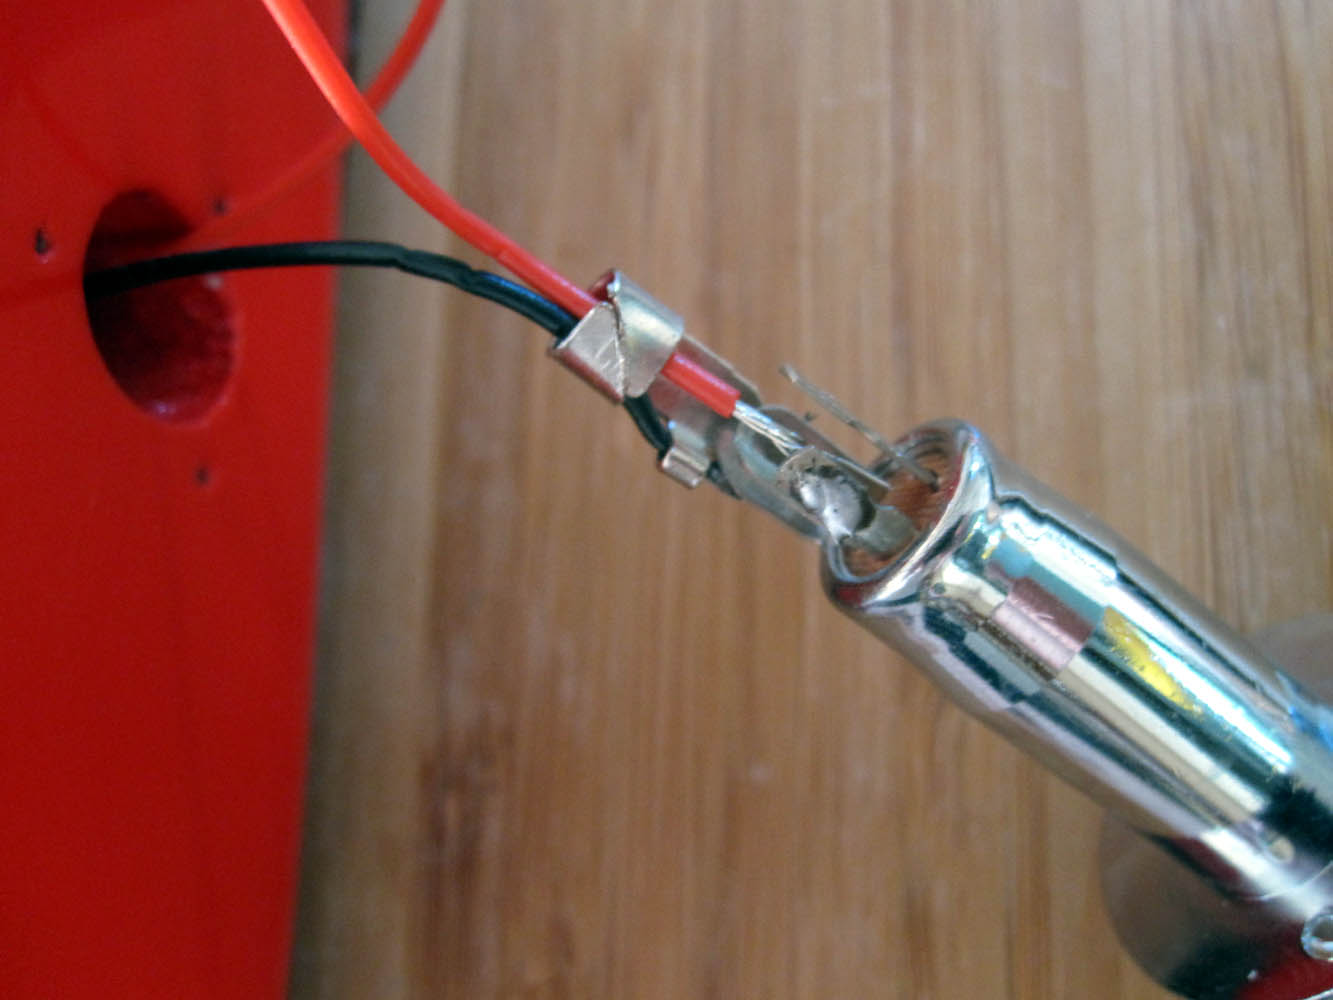 |
| I didn’t make too clean a job of this, but here you see that I soldered the jack pin. It’s a three pin live jack so I checked it with multimeter and a lead to confirm which pin I needed to wire up (it was the smallest). |
 |
| Next up I screwed down the scratch plate, screwed in the pins and fitted the volume and tone control knobs. See how I’ve laid my uke on an old tea towel. I was being ultra careful here not to slip with the screw driver or do anything else that might affect that paint job! |
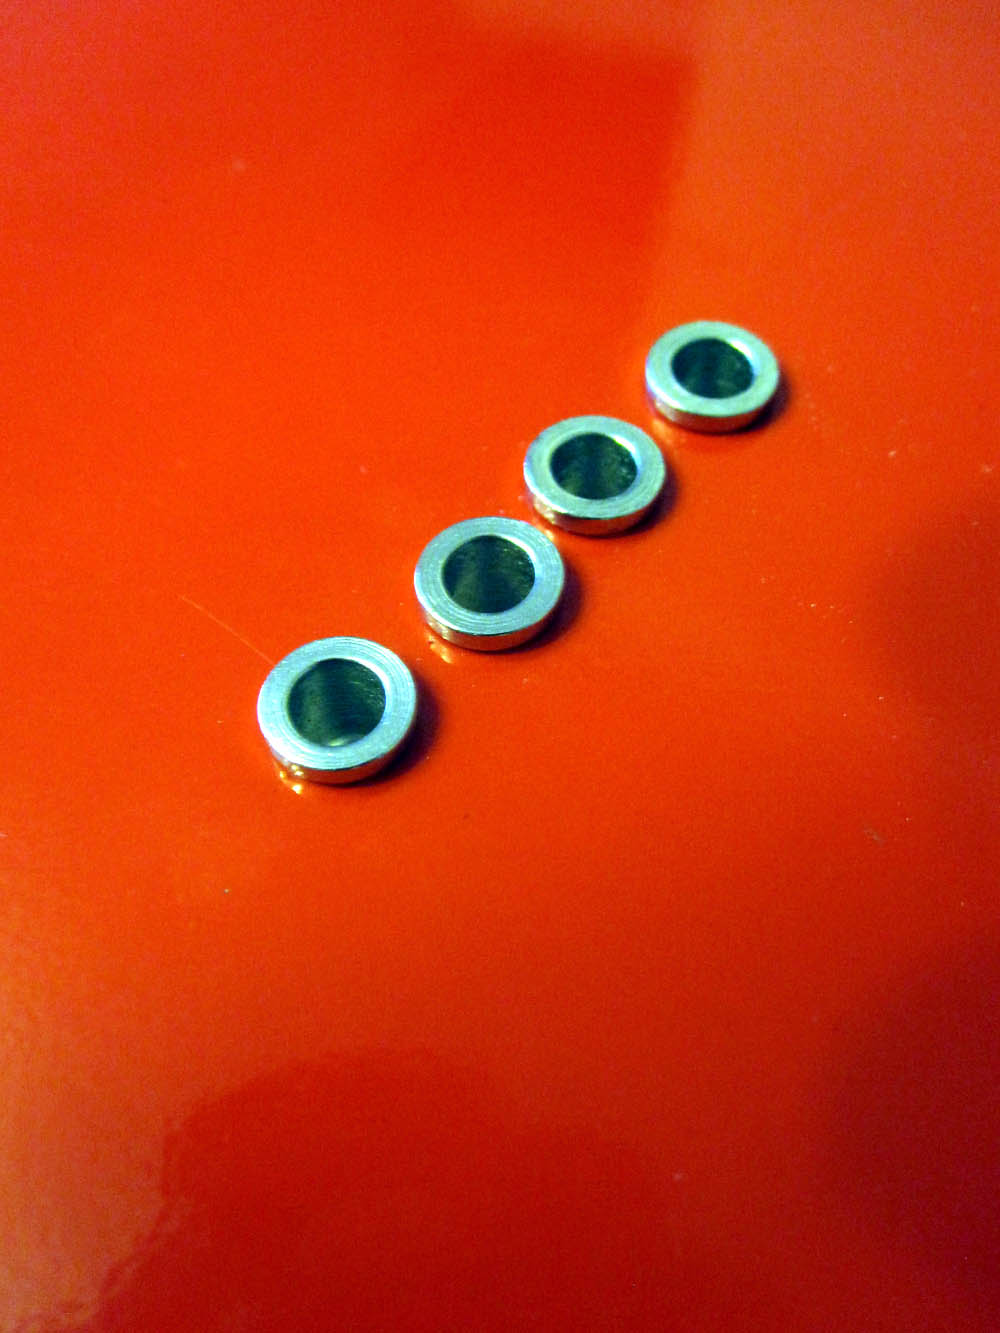 |
| I flipped the body over and put in the ferrules. I had to work the holes with a drill bit to clear some of the paint. The alignment problems I’ve talked about previously are a bit more noticeable in this picture. Still… not too shabby! |
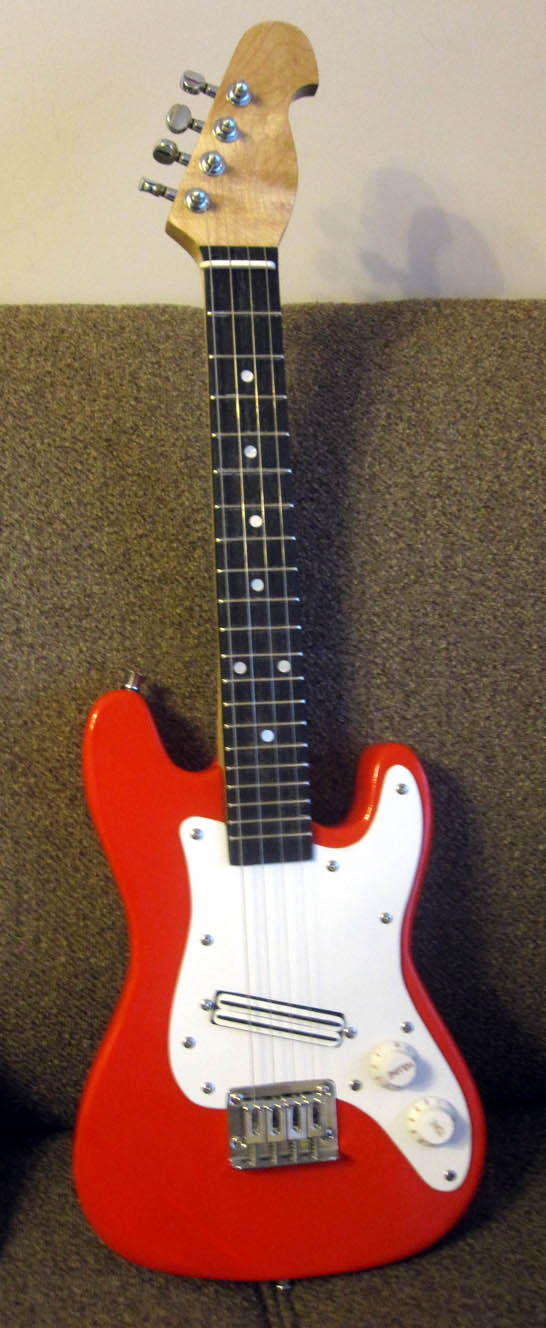 |
| I quickly put some grooves in the nut and fitted some strings. See that the nut is sliding to the left because I fitted my tuners slightly off-centre! Damn! My original pattern was meant to avoid this problem! I plugged it in and it sounded great except that I was getting some small grounding clicks. I was tired and decided to sleep on it. |
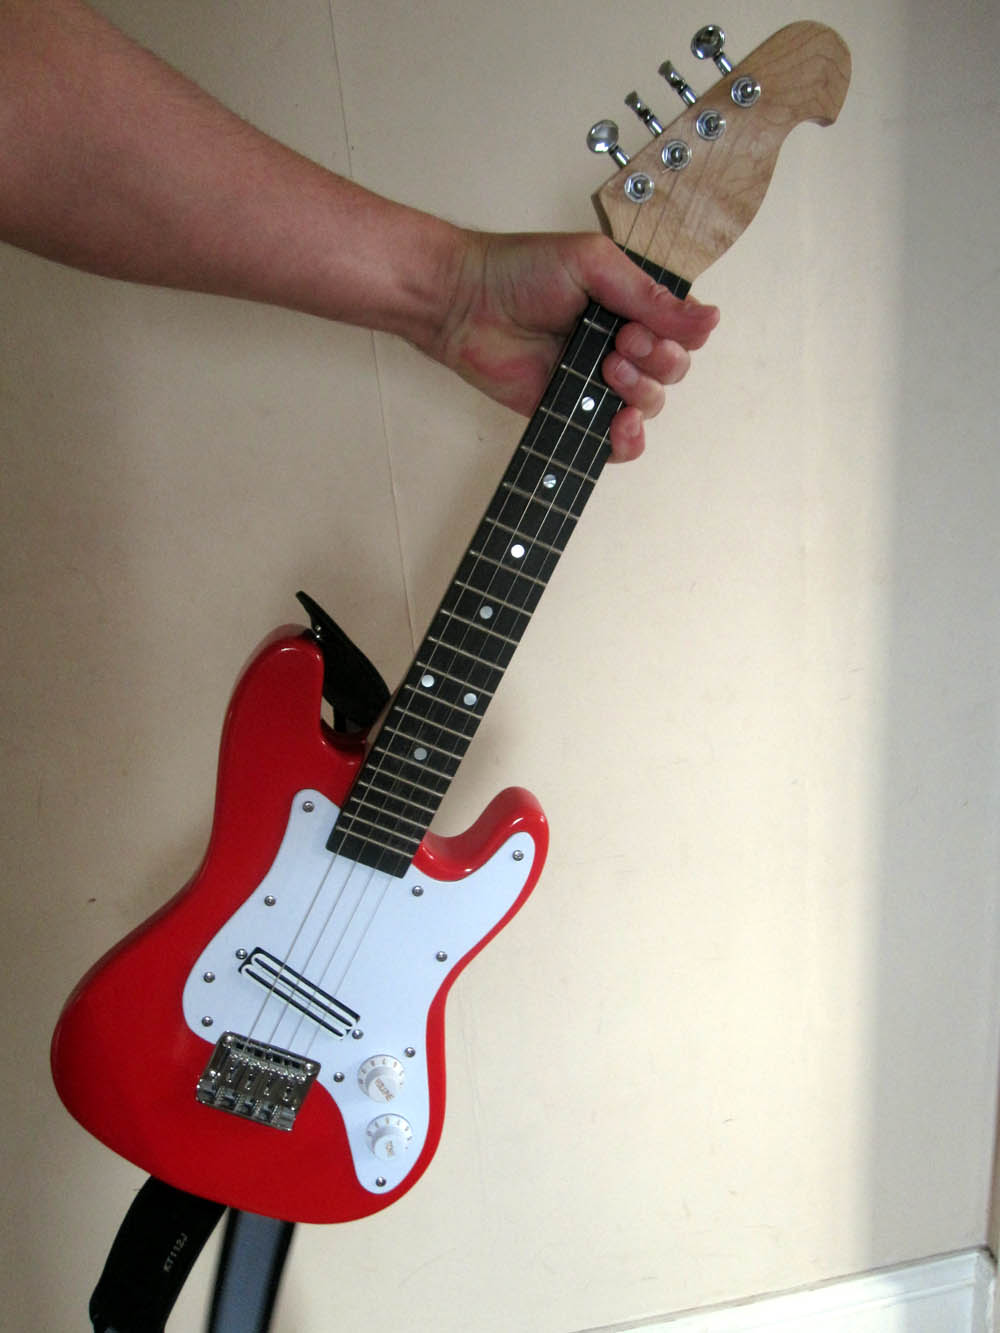 |
| Day 2. I lowered the action of the nut and using a short panel pin and a hole in the nut fixed the sliding problem. I’m still not 100% in love with the grooves, but I was too eager to get onto playing. This time there was no clicking of any sort and I was able to explore the range of the instrument and pickups. FANTASTIC! |
 |
| Meanwhile, in Argentina… |
So I know that you want to hear this instrument being played! I need to think of some appropriate songs to help to showcase it. I promise that I’ll stick a video together where you can see me playing it and hear what it sounds like. Start holding your breath now…
Comments welcome…