
If your having problems looking good while playing, learning scales, finding chords or playing a song, why not smash it to bits like this?
If that does not work, ask us for some help, we can maybe smash it for you. Or find you an answer.
If your having problems looking good while playing, learning scales, finding chords or playing a song, why not smash it to bits like this?
If that does not work, ask us for some help, we can maybe smash it for you. Or find you an answer.
Just thought i’d share this little nugget of instrument care wisdom. Gibson do a non aerosol spray polish for cleaning up your instruments. I fully recommend you grab a bottle of this for the next time you change the strings on your uke. It degunks any built up dust and grim without clouding or breaking the varnish on your instruments. The polish is safe for use on all types of finishes and has no unnatural chemical propellants or nitrates.

It also gives a slinkier feeling to any fretboard. Although it is unlikely to make much difference to the sound of your uke, it is still worth a few spray shots while you have the strings off to make your uke look and feel all brand new. Anyone who has opened the case of a new Gibson guitar will already recognise the smell of it too. Smells like rock and roll. I’m not sure why, but for some reason, Gibson seem to have left the word UKULELE off the label. Bah!
This is little beauty is without a doubt a truly great Jag-stang Ukulele replica.
It is modeled after a fiesta red Fender Jag-Stang. The body is made of alder wood. The humbucker pickup has volume and tone control. An oval jack plate is used for the neck plate. The four string bridge is from Moongazer Music.
We love it and hope to get an interview with it’s maker ‘ragtagbag’ soon. We really do need to know more.
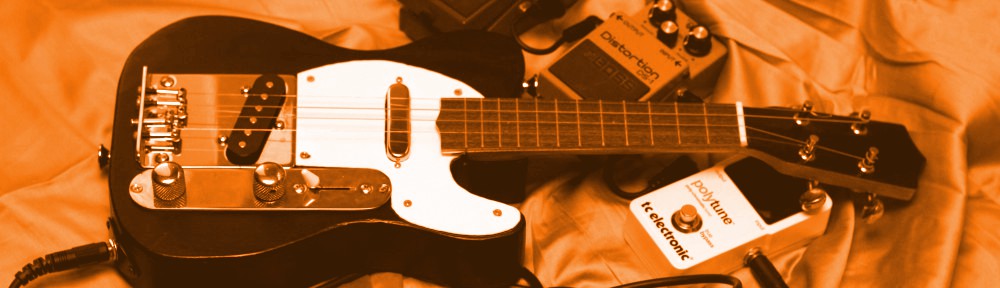
Power chords (or fifth’s as they are sometimes known) are a staple of rock and metal music as played by guitarists, but are not largely documented for ukulele’s. They go widely unnoticed in chord books and charts because ‘the man’ does not want you to rock out on your uke. Well, we got two fingers for him. If you a bit too much of a mummy’s boy, you should stop reading now. The rest of the article is for the hardcore only. 🙂
So, what is a power chord? They are 2 note chords consisting of a root note and a fifth interval. When these notes become amplified, the resonate against each other in a way that screams ROCK! This happens because the relative frequencies between the 2 notes are close to being 3:2 and as such, they drive each other along, creating more power. Obviously this works best if you add a touch of distortion which has the additional benefit of making the 2 resonating notes gain a further dynamic that sounds 1 octave lower.
On a uke, these power chords are very simple and can open up a whole new level of fun when you are playing. If you have ever seen the console game ‘Guitar Hero’, a handful of these uke chords can replace the coloured buttons on that dedicated controller for simple rock fun. The trick is to only play 2 out of the 4 strings. You can mute the other 2 strings however you like, or simply don’t play them. A little practice will help you find your way with this method.
You might want to try using power chords to replace other chords when you are playing just to see how it feels. Try replacing, say, an F with an F5 and listen to the difference it makes. There are 2 positions for each power chord. Typical rock music is empowered by the low version of the chord, but you can still use the higher version as an alternative chord.

I was asked today by R.C. Drake via King Uke :-
“Do I need a hook/hanger/mount that’s specific to the ukelele, or will a regular adjustable guitar hook keep our uke’s on the wall?”
Well, I gave them the best answer I have got for this :-
“search for ‘tool hooks’ in google”
The are cheap, easy to fit, readily available and screw into just about anything. Here, I have put a plank of wood against some of my ikea shelves, and screwed a tool hook through it. You can see I placed a cover over the end on one side, to stop it scratching my beautiful Kala Jazz Tenor that I keep inside the house.


Electric Ukulele Land has joined the “Top 50 Ukulele Sites” sites page and is currently in the top 180 most read ukulele sites in the world. I’m sure over the coming weeks, your continued support will help us get into the top half of the table and maybe even the top ten. 😀
In the meantime, there are lots and lots of ukulele resources out there for you to look around. If you leave them any comments, be sure to tell them that Electric Ukulele Land sent you 😉
Enjoy!
So you have hooked up your uke with a pickup and now you want to jam hard with it? Well, you could go out and spend lots of bucks on a marshall amp and stack, you could make your own battery powered mini amp, or now days, you can even plug you uke into your pc and rock out.
You can now pick up a USB guitar lead for same price as a second hand copy of “GUITAR HERO : METALLICA” and you can have much more fun with it. Search on google shopping or ebay for “USB GUITAR LEAD” and look for something like this :-

There is no need to buy an expensive version that comes bundled with software, we are going to show you some windows software right now that can turn your £20 uke with a budget pickup in the mother of all axe wielding rock stars. First of all you will need to download a VSTi host. If you have some recording software like cubase, you may not need this step and the other instructions will be different for you, so today we will concentrate on a simple AMP setup. For those who are new to this game, a VSTi is a virtual instrument plugin. The concept was introduced by Steinberg with early versions of Cubase but many other Digital Audio Workstation (DAW) software uses these plugins as well now. There are huge numbers of VSTi developers out there… We are just looking at one that has a bunch of good amp and pedal settings for your uke.
So first of all, we are going to download VSTHost from the VSTHost download page
Unfortunatly it does not come with an installer like most modern windows programs, but rather just a zip file that you will need to open up and extract the files from.

Create a directory called ‘C:\Program files\vstihost\’ and extract your files into there. It is a good idea to take the opportunity to create a VSTi directory at the same time, so we have a place to drop our VSTi plugins into.

Next, download the amp simulator FreeAmp 3 Full from the freeamp download page and open up the file.

Again, you need to extract it’s contents into the directory we created earlier, ‘C:\Program files\vstihost\VSTi\’

Now launch your “C:\Program Files\Vstihost\vsthost.exe”, open the file menu and click on “New Plugin”

Locate the vsti dll you extracted earlier

This should set you up with a input -> vsti -> output like this :-

Next we need to route our inputs and outputs. My uke plugs into my input 3 and my speakers are output on on 1+2. Open the “engine” menu and chose “Configure…” and then chose your inputs and outputs as required.


Now you should have sound. Play your uke a little and smile at the fact it is amped. Now stop and click this button.

It opens up your effects/amp/stack window.

From here you can fully configure your Uke’s electric setup and fully rock out like a proper uke slayer!

Remember, different setups are going to be slightly different than this. Feel free to ask questions so we can get you up and rocking 😉
My 2 year old daughter had great fun decorating her pink ukulele with stickers this afternoon. I guess she was just looking for that ‘custom look’ with the little police cars and fire trucks. Funny thing is though, I really like her work. Do you custom your uke’s?


To fit the pickup to the uke is not a huge task but it does take a little patience. Firstly, remove the strings from the uke and pop out the white plastic saddle. Underneath it there will be the bridge it rests in that has a trough cut in it to hold the saddle in place. As we are going to be fitting our pickup along the length of this, we need to route it out to ensure that the pickup and the saddle can both fit in. I did this using a dremmel and this attachment :-

I then used a hand drill and a small bit to drill through the end of the bridge so the pickup wire can be pushed through inside the uke.

The pickup lead can then be pushed through and the pickup put in place. Check that the route has left enough space for the saddle to sit in the bridge and still stand upright and that the pickup is flat.
Next I cut the hole for the preamp. This is a good step to do before putting the hole for the 1/4″ jack in as it gives you room to play. Being an all out punk about it, I simply cut into the wood with a strong craft knife until I had what I thought was the right shape. This is not the right way to do it. You should apply masking tape to the wood, draw the size of the hole and cut using more accurate tools, i.e. drill the corners with a small drill and maybe use a dremmel disc between them. This will ensure your hole is the correct dimension and also that you do not spoil the finish on your uke. I am too caveman for all that. I just cut a hole. As a consequence, my hole is ever so slightly too big and i splintered the wood on my uke, although I covered that up with a bit of ghetto red felt tip. In this picture you can see just what a bad job I did. I have already plugged the leads in here though.

Then move on to the 1/4″ jack. I drilled a hole in the side of the uke towards the bottom. I have seen lots of ukes and guitars where the jack hole is where the strap button goes directly opposite the neck of the guitar, but, this area is well braced on these ukes, and it is hard to gauge the thickness of the wood at this part. Electric guitars tend to have the jack hole the bottom edge, so that is where i put mine. I simply drilled it out and pushed the jack through the insides. Again, you should mask the wood to stop splits and breaks in the wood and finish. I am uberpunk. I didn’t and it looks bad. You might want a dob of glue under the nut just to hold both the nut and screw in place.


Next I plugged the 2 leads into the preamp box, and used the plastic table tidy to sit everything in place inside the uke. I then screwed in the preamp box. It is not a perfect fit, and beady eyes will see the mistakes, but I am not bothered 😉 Screw the preamp into place and make sure it holds in well.

I changed my mind about the strings, instead opting now for a set of Aquila’s with a low ‘G’ string to add even more punking action and a bit more bass. I am sure that the preamp box is identical to a guitar version of the same thing and the extra bass of the low ‘G’ should help to fatten out the sound. Besides, I have never had a low ‘G’ uke before.

Finally, I added a punk sticker to the back of the uke…

And the uke is now electric 😀 ROCK!


JOEL ECKHAUS began building instruments in 1973. He opened a shop in 1976, and has been playing, teaching, designing, building, and repairing string instruments ever since. His woodworking experience also includes sailboat repair and construction, home renovation, nickelodeon construction, whirligig design and production, fine furniture and cabinetmaking, and production lutherie with Dana Bourgeois Guitars. Joel has a BS degree in vocational education and currently teaches woodworking and instrument making at Maine College of Art.
In addition to being a luthier, Joel also plays the mandolin, tenor guitar and banjo, ukulele, and musical saw. He studied uke and banjo with former vaudevillian, Roy Smeck, the “Wizard of the Strings”, and studied mandolin with former Texas Playboy, Tiny Moore. He was a founding member of the Arm and Hammer String Band, and has performed with the New York Banjo Ensemble, the Howitzer Mandolin Orchestra, the Neverly Brothers, the Blue Sky Serenaders, the New England New Vaudeville Review and the Pinetones. He currently plays with the ukabilly duo Dos Eckies; a ukulele/tap dance duo, Ham & Legs; and his own group, Ukulele Eck and the Fabulous Lacklusters.
You can find out more about his instruments and contact him at the Earnest Instruments website

Ukes have become very popular over the last few years. Most people who like them play acoustic ukes. What inspired you to make electric ukuleles?
The short answer is….”why not?”
The longer answer is that instruments evolve. Before the 1930’s there were no electric guitars, but they were quickly accepted in the guitar community. They filled a need for louder instruments, and eventually helped to create entire new vocabularies and styles of music.
I used to think that ukes had to be acoustic, reentrant, and have nylon strings, but the cavaquinho, which evolved from similar portuguese roots, broke those rules long ago. Many players from Brazil and Cape Verde still refer to them as ukuleles.
The music has evolved too. Ukes are no longer limited just to Hawaiian music. They were quickly adapted in the early teens and twenties to popular music, and since then have been heard in ragtime, jazz, folk, country, classical, and rock music. It seems like a natural evolution to add solid body electric ukes to the musical palette.
Your ukes (and other instruments) are very unique. What are the most important parts of the build process for you?
I look at all the old ukes as well as other instruments and use ideas, shapes, styles, and materials in my design process. I’m trying to get away from building copies of other instruments, both for legal reasons and because I prefer building my own designs.
With acoustic ukes, I really try to keep things lightweight, more so than many of the imported ukes I see. The wood is thinner, the braces are smaller, even the kerfing is less massive. With electrics I favor lighter bodies too. Mahogany and swamp ash are not as dense as maple, or rosewood. I want to bring out the “bass” in a uke. Heavy woods tend to be sound too brittle or bright.
If you could make a uke for someone in specific, who would it be and what special features would you include?
I’d like to see more of my own designs getting used in pop music as well as other styles. Eddie Vedder plays one of my Tululeles, based on a Telecaster shape, and John King played a Stradelele, based on a Stradivarius guitar. Both are my adaptations of a classic shape transferred to a uke. A few of my designs, like the Sputnik and the Boomerang, are original shapes based on 50’s and early 60’s electrics. I’m currently working with a friend to design and build an acoustic/electric uke for Merrill Garbus of Tuneyards.
Which materials do you prefer when you build bodies and necks? What ones should builders avoid?
I like mahogany a lot. It’s strong and light, but not too dense or hard. Ukes are pretty small and high pitched. I want to bring out the “low” end of the uke. Koa is brighter but can be loud and clear when it’s thinned out. I’ve used ash for the Tululele and the Paddlelele and I think its a great tonewood. More and more I use spruce for the tops, especially with the denser back woods like maple, rosewood, walnut, etc.

Sourcing four string parts such as bridges and pickups can be very difficult. What’s your approach with these?
I make some parts like bridges, neck plates, and coverplates out of nickel silver sheet stock. With a bandsaw, drill press and various sanders, I can make many small parts. The nickel silver polishes nicely and I don’t need to have the parts plated. I also use standard guitar bridges and tailpieces one four and sometimes five string instruments.
I buy stock guitar pickups for most of my electric mandolins, tenors guitars and ukes. To have the pickups custom made would be too expensive, and I don’t have the time, interest or equipment to make my own pickups.
What’s your most important luthier tool? Do you use cnc or power tools at any stage?
Most important tool is probably my thickness sander. Getting tops ,back and sides to their optimal thickness quickly is important. Leveling inlays and sanding figured wood to thickness is made so much simpler with it.
I have most of the standard woodworking machines as well as many hand tools. I don’t own or operate a CNC machine, but I have had some parts made on CNC by people that specialize in that work. The necks and bodies of my concert Tululeles were made by CNC. Any custom inlay work…blocks, names, logos is usually done by CNC inlay shops, I hate cutting, and inlaying pearl, except for dots. I don’t even really like the way a heavily inlayed instrument looks.
Do you play or build other instruments too? How does your uke building knowledge transfer to them and vice versa? Are there common techniques?
I also play and build acoustic and electric mandolins, tenors guitars and do some repairs and restorations. I’ve built some more unusual custom instruments as well, electric dulcimers, walking stick ukes, painted ukes, It’s all lutherie, just different instruments. My knowledge of instrument history is important. I’ve looked at a lot of instruments in museums, stores, guitar shows, books, wherever. Everyplace I go, I try to find out something about the local music and it’s instruments. I took Charango lessons in Argentina, and heard some great Russian balalaika playing in Spain.

When it comes to electrical components, how do you prefer to configure them? Have you ever tried different pots / resistors / pickups in the same uke to compare the sounds? What wins it for you?
My knowledge of electronics is minimal. I can follow a diagram and wire up most configurations, sometimes with a lot of head scratching. I usually buy Kent Armstrong pickups because they’re relatively cheap and reliable. If someone requests a pricier pickup, I’m happy to get it for them. I like 2 pickup instruments the best. I can get all the sounds I need from 2 pickups. I done a few 3 pickup tenors, and sometimes with some sort of bridge transducer as well. I prefer to keep it simple.
If you could have played electric uke on one classic rock or blues track which would it be?
We’ll I play a lot of old Rock ‘n Roll in my uke-abilly duo, dos Eckies, with my friend, Kris Eckhardt. Kris played in a local rockabilly band called King Memphis, that played a festival in England a few years back. We do Elvis, the Everly’s, Buddy Holly, Ricky Nelson, Chuck Berry, and more. Kris has a great electric guitar style that he transfers to the uke, He’s also built a Whammy bar for his Tululele which works pretty good.
So the tune I’d like to learn next is probably the Kink’s “You Really Got Me”
