We have been lucky enough to find another Ukulele builder, Daniel Hulbert, for the latest instalment in our Exclusive Interview’s. Daniel lives in Utah, USA with his wife and two young children. When he is not working as an electrical engineer, he spends his spare timewith tools in his hands making some really nice electric ukes.

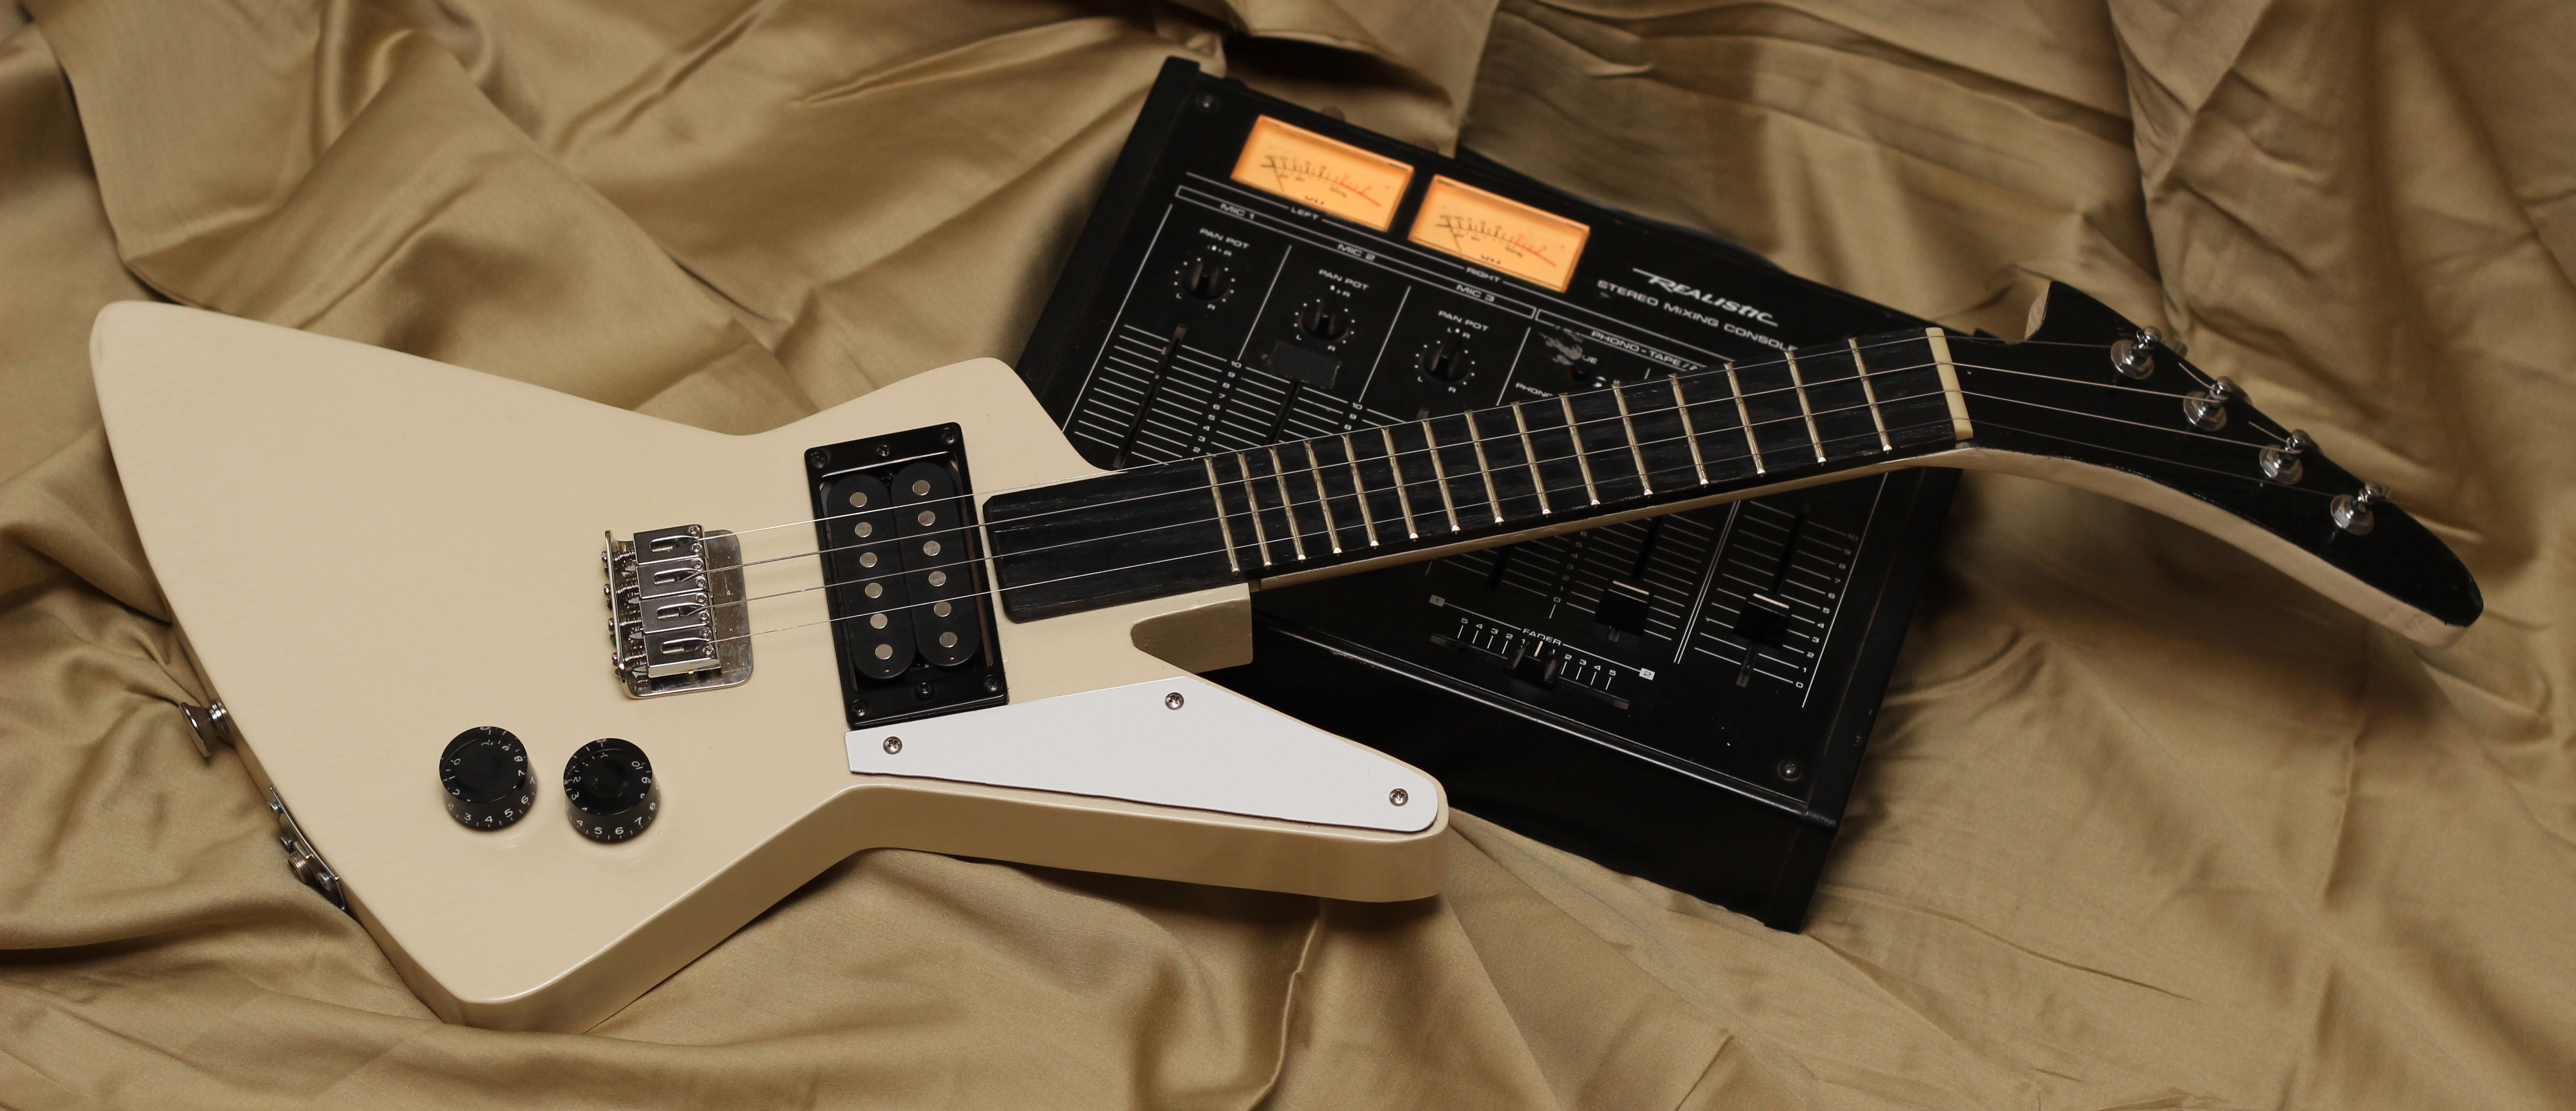
Explorer Ukulele: (2011) - This futuristic design works very well as an electric ukulele. The color scheme and hardware closely resemble a full-sized Classic White Gibson Explorer.
How did you get into building Uke’s, Daniel?
I started to build instruments in 2009. My first instruments were basic instruments made out of altoids and cookie tins. My confidence increased, as I built more instruments. I soon made my first solid body electric ukulele. I learned a lot from and that build and have continued to gain knowledge. With solid-body electric ukuleles, I have also fashioned playable ukuleles out of tennis racquets, a frying pan, and even a bedpan.
How much planning goes into making your ukes? Do you draw out your own designs or did you manage to find designs somewhere else?
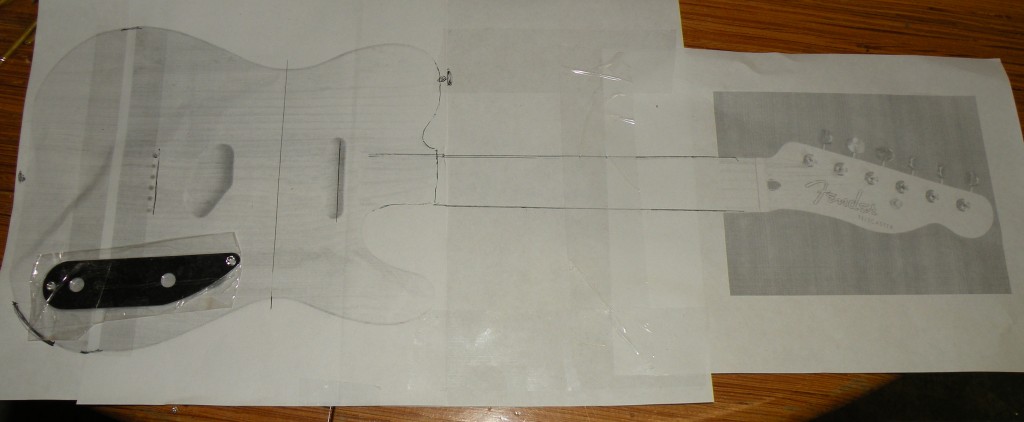
I start my planning by staring, ofttimes longingly, at different guitar designs. When one suits my fancy, I begin to figure out the needed parts and supplies. Another thing that helps is to make a full-sized paper mockup of the ukulele. Doing this helps to ensure that the end product will be able to accommodate the pickups, tuners, control plates, etc.
So far, my electric ukuleles have been tributes to regular-sized electric guitars. In this respect, much of the design has been done. The task is to figure out how to pack the essense of the guitar into uke form.

When you set off building a uke do you design the ukulele based upon the parts you have, or are you hunting down the parts to fit? Are there any parts you struggle to find?
A more prudent builder would cobble together an instrument with on hand parts. Unfortunately my ukuleles require me to scour heaven and earth (i.e. the internet) to find specific parts. Luckily, there are plenty of resources for luthiers online. Four string electric bridges are fairly easy to track down, although the variety is quite limited.
Someday I’ll fashion together a “Mulligan uke” with the loose parts that I’ve accumulated. That will save money on merchandise and eliminate shipping time.
We know how hard it is to find 4 pole pickups, especially with re-entrant G designs. We have noticed you use 6 pole guitar pickups on your ukes. It looks like you line up the strings with poles 2-5 Do you find this changes the sound at all? Did you ever consider winding your own pickups? Have you tried using hot rails?
When I first researched the idea of building my own electric ukulele, the dearth of 4 pole pickups became very apparent. I toyed with the idea of making my own, but the cost of the supplies and equipment quickly squelched that plan. I’m more than happy to simply buy affordable guitar pickups that suit my needs.
My reason that I have never used hot rails? They haven’t matched my build’s aesthetics. (It’s not a great reason, but it’s a reason.) Maybe I’ll incorporate them into future builds because they’d probably offer an elegant solution.

Telecaster Ukulele: (2010) - This was the first electric ukulele that I built. I wanted it to function in the same manner as a full sized telecaster. You can see that the parts are the same as would be used on a full sized Tele. I roughed out the body with a borrowed scroll saw and router, and then did the rest of the work in our small apartment.
Which strings do you use and what sizes? Do you tune low or high ‘G’?
I use “D’Addario EXL110W Nickel Wound, Regular Light, Wound 3rd, 10-46” electric guitar strings. That may seem overly specific, but they work great for my electric ukulele builds. Having the wound 3rd string actually makes a big difference. The four thinnest strings of the electric guitar set are shuffled around for my instruments. They are in this order (guitar string – ukulele string): (b – g), (d – c), (g – e), (high e – a). This order has the two wound strings in the middle.
My electric ukuleles are tuned in a “high G” configuration. My foray into ukuleles started when I bought my very first uke six years ago. Having a guitar background, the non-reentrant “low G” seemed more natural. After buying a fingerstyle ukulele book that called for a “high G” tuning, I tuned the ‘G’ up one octave and haven’t looked back since. I feel that the reentrant tuning is more characteristic of the “ukulele sound” that we love.
Which other guitar parts have you found you can salvage?
I love musical instruments. I feel a twinge of sorrow when I see an instrument at a secondhand store or garage sale that is in disrepair (incidentally, I’m not a fan of Pete Townshend’s on stage behavior). When I acquire one of these castoffs, I’ll try to repurpose every part it that I can. This can be a great way to find tuners and pickups, along with smaller items like strap pegs and screws. Everything else gets placed in the “to-be-used-later” bin.

Jag-Stang Ukulele: (2011) - The Jag-Stang electric guitar is a modern classic. It combines elements of both the Fender Mustang and Jaguar into an intriguing hybrid.
Which woods do you use for the bodies and the neck? You mentioned that you use a scroll saw to rough shape the body and a router to cut out the cavities, but are their any other tools you can recommend while building?
I’ve used ash and alder for my ukulele bodies. They are sturdy, fairly easy to work with, and cost effective. I also have a 1.5 inch thick piece of mahogany sitting in my garage that I’m saving for a “stain-grade ukulele”. It would be a shame to paint over that wood, so that ukulele will have a “heritage cherry” finish. My necks are made of maple. Lots of electric guitar necks are made from it for a reason. It’s solid and sturdy wood.
Besides a scroll saw and a router, a drill press would be nice to have. I say “nice to have” because I haven’t bought one for myself yet. I do my drilling with a handheld electric drill. It works, but not as well as a drill press. A thin bladed saw is also a great thing to have for cutting fret slots.
Do you carve the necks yourself? How do you go about fretting them? What scale of neck do you prefer?
Necks can be intimidating. A lot of my apprehension was allayed when I became familiar with the “scarf joint”. A one-piece neck is obviously the best solution, but it is difficult to make. Gluing on a head is a great way to make a neck, especially for angled headstocks.
I slot my boards with an online fret calculator, a precision miter box, and a thin bladed pull saw. Then, I tap the fretwire into the slots with a plastic mallet. I trim the excess fretwire off with a Stewart-MacDonald fret cutter. A soprano scale (13”) is my most used, but I may branch out to concert and tenor scales soon.

DIY Travel Ukulele: (2011) - I wanted to make a ukulele with parts and wood that is readily available. I added a rod piezo to the bridge to amplify it. It's great for traveling. I made plans for it which are available for free by emailing circuitsandstrings@gmail.com.
We presume that you paint up your uke’s just like electric guitars. Your finishes look really nice for home made instruments. Can you share any insight?
My ukuleles are painted in my garage with spray cans. My first instruments were finished with spray paint from a hardware store. I figured that paint was paint and there was no need for the expensive “instrument grade” nitrocellulose lacquer. I was very wrong. I was trying to scrimp on the paint and I wasn’t getting the results that I wanted. I got some lacquer from Reranch and the stuff worked great. I now follow the “Nitrocellulose Finishing Schedule” provided by Stewart-MacDonald. If you follow it properly, you should get good results. Filling the grain, sealing the wood, along with wet sanding and buffing the finish are some of the steps essential for a good end product.
Any final advice for other hobby uke builders? Is there anything you reckon we should all avoid at all costs?
Making an electric ukulele takes a lot of work. It also takes some money. If you want to make an electric ukulele, make something that you can be proud of. Avoid the desire to go cheap on the paint. It is silly to spend hours and hours of time to make an instrument, and then finish the ukulele with bad looking paint. The rest of the components don’t have to be top of the line, just find some that are of good quality.
Where can we see the ukes and you playing them?
I have two YouTube Channels. These channels have a variety of electric and acoustic ukuleles, as well as some other instruments.
http://www.youtube.com/user/CircuitsAndStrings
http://www.youtube.com/user/ragtagbag
If you want to contact Daniel or want a copy of his plans for building the Travel Uke, you can do so by emailing circuitsandstrings@gmail.com and telling him ukeland.co.uk sent you 😉


