Telecaster uke build : part 05 – The neck (frets and such)

I used my recently acquired drill press to drill holes for the fret and side markers.  The side markers were made by drilling shallow holes, pushing thin plastic rods into the holes and then flush cutting the rods.  The fret markers were made by gluing the premade hard plastic dots into the holes.

The frets were pounded into the slots with a plastic tipped hammer.  Excess fretwire was trimmed off with a fret cutter.

I use t-nuts to attach the neck to the body.  I feel that this makes the connection stronger.  The neck will have a lot of tension on it, so I want it to be securely fastened.  Small screws help to hold the t-nuts in place.

I took a chisel and cut out the area for the t-nuts.  This will make the top of the t-nuts and screws flush with the bottom of the neck.

I will use an oval jack plate for the neck plate.

The neck is ready to be clear coated.  I think I’ll do about 6-7 coats of clear laquer.

Telecaster uke build : part 04 – Routing the body

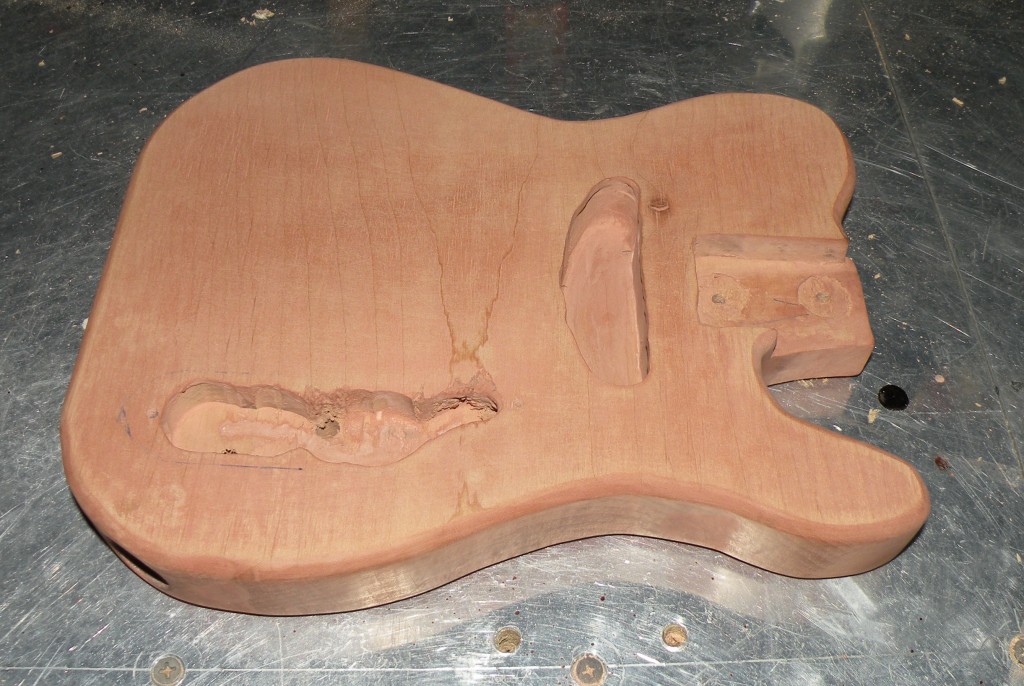
The major shaping and routing were done with a round-over bit and a straight bit.   I used the round-over bit around the edge.  The straight bit was used for the pickup and control cavities, along with the neck pocket.

The body is now routed.  The routing for the control cavity isn’t my best work, but the control plate will easily cover everything.

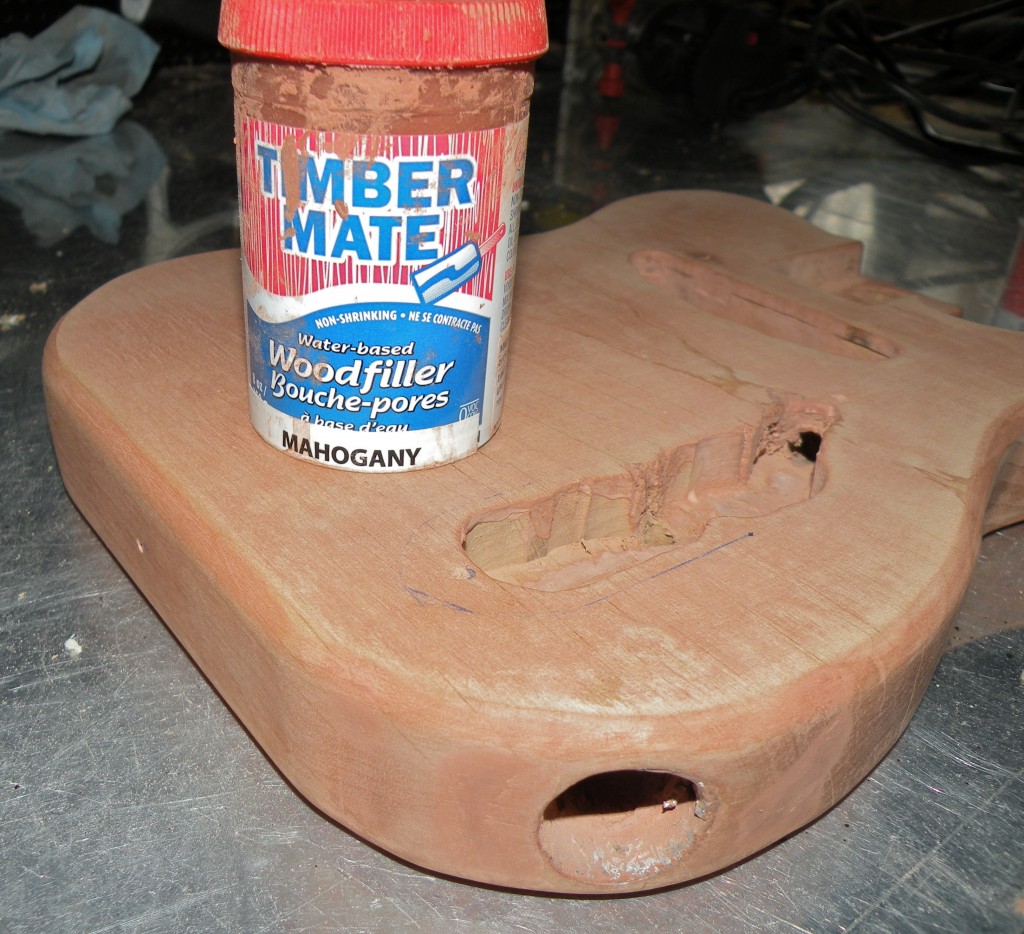
Timbermate wood filler is great stuff.  Even though alder is considered a non-porous wood,  I’ve found that spreading wood filler all over the wood (I rub it on with a gloved hand) makes sanding the wood smooth much easier.

Since I’m painting this body, I didn’t worry that my wood filler stained the wood a little.  If you wanted a natural finish on your instrument, you would use a wood filler with a hue closer to the wood’s natural color.

I penciled in the pickguard on the body.  (Remember that if you are painting the body, then you can mark out the various parts with impunity.  If you are running out of paper, you could even use it to do long division.  If your finish will be transparent, mark in a way that can easily be erased.) I then traced the pickguard shape on some tracing paper.  This is a great way to get a template for the scroll saw cutting.

The pickguard is now ready for holes.  I think I’ll use 8 screws to attach it to the body.

The body is ready to be to be sealed.  Applying a clear coat and then sanding it as smooth as possible is critical in order to have a nice, flat surface for the paint.

The bridge hasn’t arrived yet.  Normally, I’d drill all of the holes before I sealed the body, but that’s not critical.  I’ll just give the laquer time to cure, and then finish drilling.

Telecaster uke build : part 03 – Cutting the neck

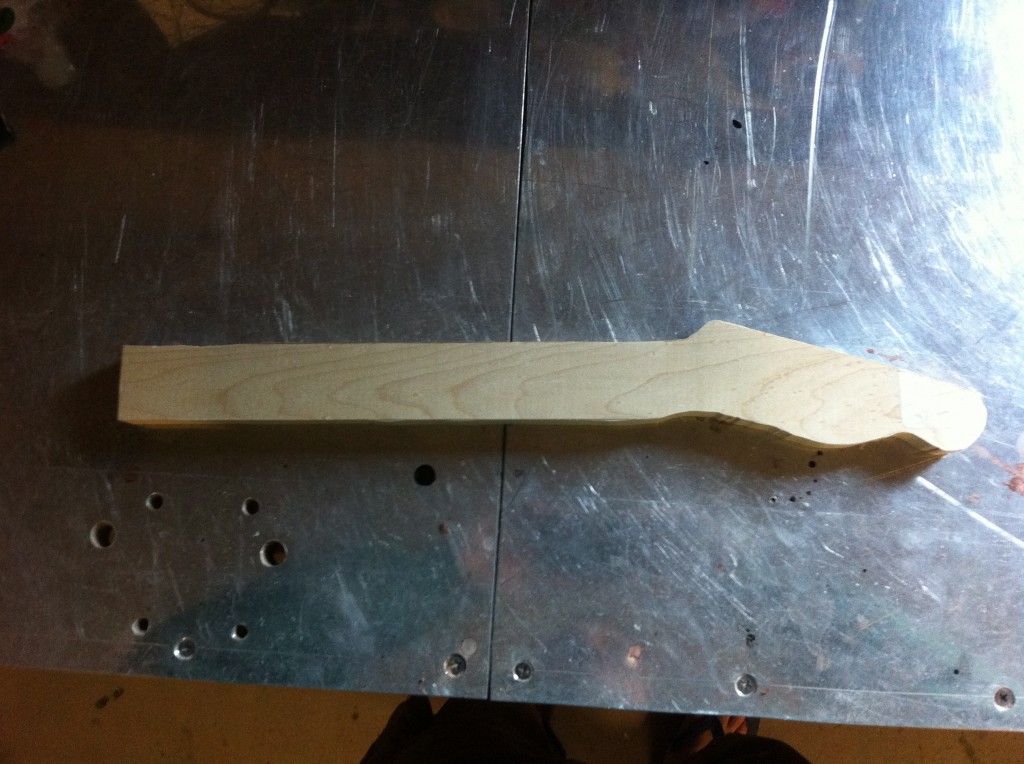
This neck started out as a .75 X 3 inch maple board.  I traced out the headstock and figured out how long the rest of the neck needed to be.  The overall scale length will be 15 inches.

Once again, a scroll saw was used to cut the wood.

I marked the nut and fret positions and then used the “waste” piece to keep the neck square as I cut the slots with a thin bladed saw and a miter box.  Once I get a drill press, I’ll  drill the tuning machine holes.  I will use black dots as the fret markers.  These will contrast nicely with the maple wood.

I used a roundover bit on my router to rough out the profile of the neck.

A spoke shave is an awesome tool for carving necks.  With it, I was able to transform the bulky, squarish board into a smooth and comfortable neck in a relatively short time.  Some 100 and 220 grit sandpaper also helped to get rid of the rough edges.

Once I drill the holes, set the frets, and inlay the dots, the neck will be ready for a clear coat laquer.

Telecaster uke build : part 02 – Cutting the body

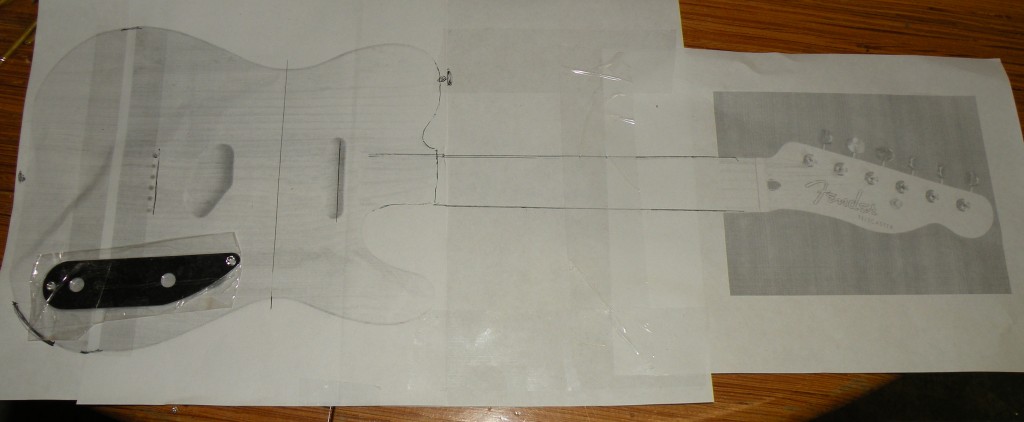
I started this project by printing out a body and a headtstock on some paper.  This is done to make sure that all of the parts will fit, and so that I can see if everything is proportional.  These papers will be used to mark the lines on the wood to be cut.

The body is made of 1.5 inch thick alder.  I cut out the body with a scroll saw.  A scroll saw is a great tool for this type of job.

The body is now cut out.  Next will come sanding, routing, drilling, and more sanding.  When all of that is accomplished, then I can start preparing it for painting.

Telecaster uke build : part 01 – Idea

Ahh…the Telecaster.  The iconic guitar that launched 10,000 licks.  Elegant in it’s beauty and playability.   Everyman in it’s straightforward design and construction.

Okay.  Enough pontification.

The very first electric ukulele that I built was styled after a Telecaster.  I used a neck from a kit because I didn’t have the resources or skills to make my own. All of the main parts were the same ones that would be used on a full-sized Tele.  I liked the functionally of the two pickups and the selector switch, but the small body left very little surface area for all of the parts.

I am going to revisit my first build and make another Telecaster ukulele.  The desire is to make an instrument that plays beautifully and resembles a Standard Telecaster.  Here are some things that I want to incorporate into this ukulele:

  • 15 inch scale.  Most of my other builds have been soprano scale, but I want this to be a little longer.
  • One piece maple neck and fretboard.  This will add a degree of difficulty to the build.  If I mess up the fretboard, the whole neck is trash.
  • One pickup with tone and volume controls.
  • String-thru-body bridge.
  • Fiesta Red nitrocellulose lacquer finish.  Thankfully, I have some of this paint leftover from my Jag-Stang ukulele build.

That should wrap up the preliminary stuff.  I’m excited to get working on this thing!

Stagg Electric Uke Hack : Fixing the Buzz

Not too far back I fitted a piezo pickup to one of my ukuleles. It was a cheap and fairly painless exercise. Today I’m going to talk about some of the mechanics of amping the instrument.

First let’s get some technical stuff out of the way:

“Piezoelectric fields result predominantly

from atomic layer displacements along

the nanowire axis within both the core

and shell materials.”

– American Chemical Society

Continue reading

Stagg Electric Uke Hack : Fitting a pickup to a cheap uke

King Uke has also fitted a piezo pickup to his £11 Stagg US-10 Ukulele.

My inspiration was a series of posts stuck up by Electric Ukulele Land on the Electric Ukulele Land website. After some words of encouragement and a few pointers from Julian Davies I got onto ebay and ordered the pickup: a UK-2000… from Hong Kong.

It arrived this morning!

Continue reading

Lidl Electric Uke Hack : part 03 – the fitting

To fit the pickup to the uke is not a huge task but it does take a little patience. Firstly, remove the strings from the uke and pop out the white plastic saddle. Underneath it there will be the bridge it rests in that has a trough cut in it to hold the saddle in place. As we are going to be fitting our pickup along the length of this, we need to route it out to ensure that the pickup and the saddle can both fit in. I did this using a dremmel and this attachment :-

I then used a hand drill and a small bit to drill through the end of the bridge so the pickup wire can be pushed through inside the uke.

The pickup lead can then be pushed through and the pickup put in place. Check that the route has left enough space for the saddle to sit in the bridge and still stand upright and that the pickup is flat.

Next I cut the hole for the preamp. This is a good step to do before putting the hole for the 1/4″ jack in as it gives you room to play. Being an all out punk about it, I simply cut into the wood with a strong craft knife until I had what I thought was the right shape. This is not the right way to do it. You should apply masking tape to the wood, draw the size of the hole and cut using more accurate tools, i.e. drill the corners with a small drill and maybe use a dremmel disc between them. This will ensure your hole is the correct dimension and also that you do not spoil the finish on your uke. I am too caveman for all that. I just cut a hole. As a consequence, my hole is ever so slightly too big and i splintered the wood on my uke, although I covered that up with a bit of ghetto red felt tip. In this picture you can see just what a bad job I did. I have already plugged the leads in here though.

Then move on to the 1/4″ jack. I drilled a hole in the side of the uke towards the bottom. I have seen lots of ukes and guitars where the jack hole is where the strap button goes directly opposite the neck of the guitar, but, this area is well braced on these ukes, and it is hard to gauge the thickness of the wood at this part. Electric guitars tend to have the jack hole the bottom edge, so that is where i put mine. I simply drilled it out and pushed the jack through the insides. Again, you should mask the wood to stop splits and breaks in the wood and finish. I am uberpunk. I didn’t and it looks bad. You might want a dob of glue under the nut just to hold both the nut and screw in place.

Next I plugged the 2 leads into the preamp box, and used the plastic table tidy to sit everything in place inside the uke. I then screwed in the preamp box. It is not a perfect fit, and beady eyes will see the mistakes, but I am not bothered 😉 Screw the preamp into place and make sure it holds in well.

I changed my mind about the strings, instead opting now for a set of Aquila’s with a low ‘G’ string to add even more punking action and a bit more bass. I am sure that the preamp box is identical to a guitar version of the same thing and the extra bass of the low ‘G’ should help to fatten out the sound. Besides, I have never had a low ‘G’ uke before.

Finally, I added a punk sticker to the back of the uke…

And the uke is now electric 😀 ROCK!

Tearcaster uke build : part 03 – Pickup and Bridge custom parts

As I am sure you can imagine, finding good pickups for an electric ukulele is a tricky business. Off the shelf options are limited, with most people I know suggesting P-bass pickups. See the problem here? they are designed for bass guitars… not for ukes. You can look at electric mandolin pickups, you can look at hot rail pickups, you can use a guitar pickup. Not one of these solutions looks right though, and I am sure that sound performance will be held back. I got lucky with mine. I found a real nice guy called Pete Mallinson at Almuse and he makes custom links to match your requirements. And he really knows his stuff. This is the single coil pickup he made for the Tearcaster uke :-

It is a fully custom design. 4 pole, 12mm string spacing, with the re-entrant gCEA tuning in mind, meaning that the ‘g’ pole is the right size for a high ‘g’ string. Not only this, but Pete gave a choice of colours, a choice of clockwise/anti-clockwise and a choice of N/S or S/N polarity. If I wanted anything else out of the ordinary, all I had to do was ask. He will happily make you different rated pickups for bridge and neck too, if you are ordering a pair. How cool is that?

In addition, Pete also provided one of the hardest parts for me to locate, the 4 string bridge plate. This takes standard Fender style bridge saddles that you can salvage from any ol’ strat or tele bridge, both of which are cheap as chips on ebay now. In the photo here, the saddles are in need of a clean up, but I just screwed them on quickly so you could all see how nice a fit they are.

Pete is a real gent and I get the feeling he loves his work. He was happy to help me get all the details right and even offered up some other ideas (more on that in another post). You can get current prices for his stuff from the site, but really don’t be afraid to mail him with your requirements.

I just can’t wait to get this all wired up and shredding now. Only I do need to find a body for the Tearcaster uke first. That would seem like the logical thing to do for pt 04.