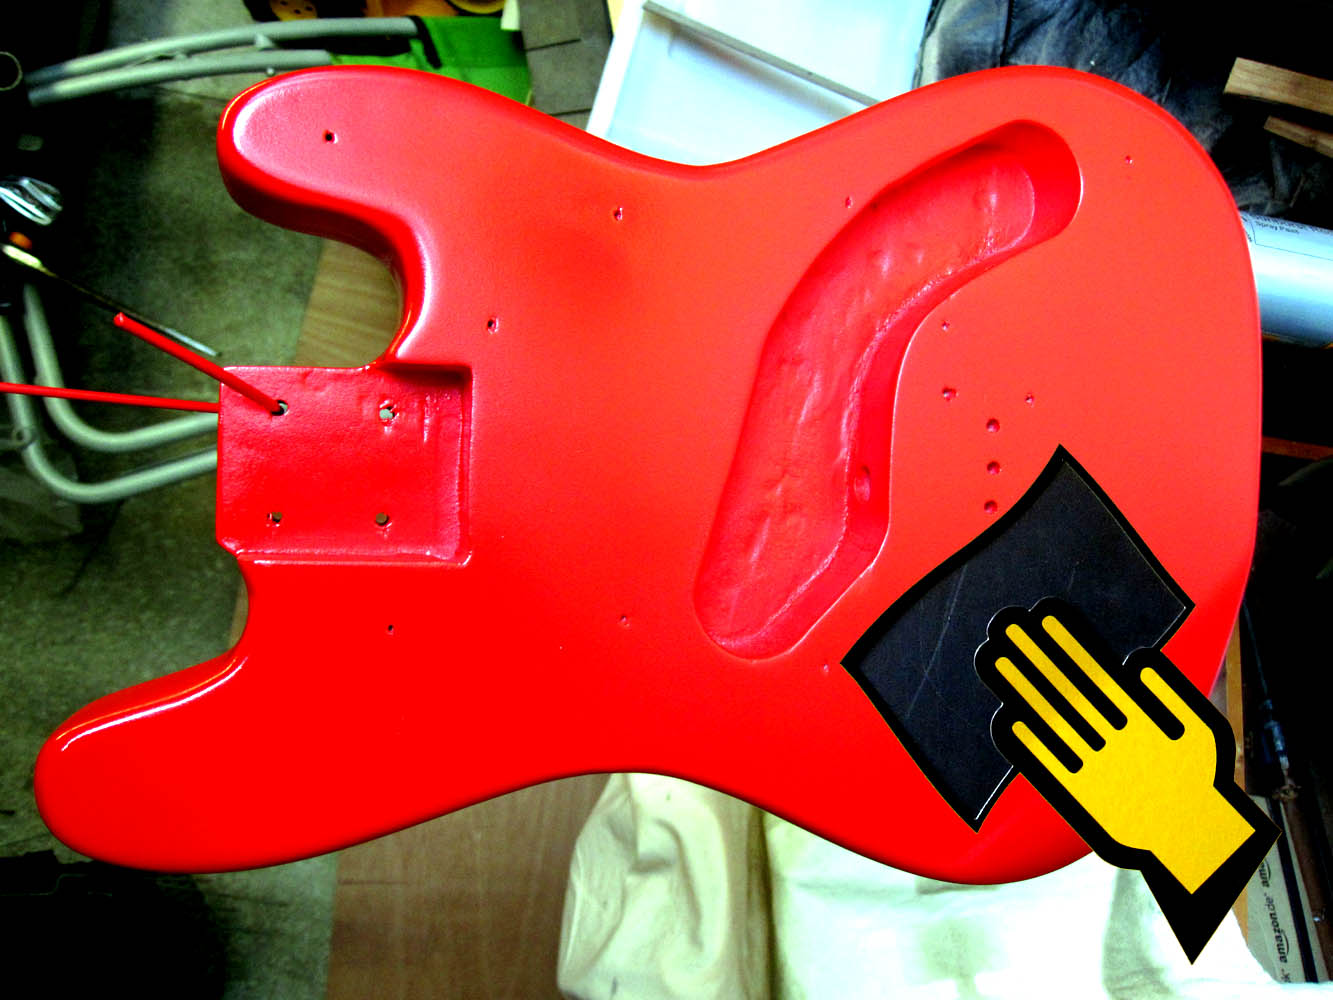
I’m not sure that I have the patience to be an expert painter. I’m not sure that I have a gentle enough touch to be an expert painter. In my last post I talked about some of the challenges I’ve been having painting the body of my electric ukulele. I’d had a bit of a nightmare with the undercoat, but things seemed to be looking up. I closed off having applied the red finish and having left the body to hang for 24 hours. Have you been wondering what happened next? Read on…
Earlier this week I heeded Daniel Hulbert’s sage advice and decided to test out the wiring on my electric ukulele build. You will remember that I was being a right smart-arse refusing to test until I’d painted the body. Perhaps it was the paint fumes talking? What would you say if I was to tell you that having tested the bloody thing, that it wasn’t working? Yeah, I know… what are the odds of that!
I’m back with another installment in my story about what it takes to build an electric ukulele. Pretty much all the fiddly stuff is done. In my last update I talked about wiring up the electrics. Daniel Hulbert has suggested that I check that it works before I go too much further. Thanks Daniel… I will do that soon… I promise! Not before I’ve painted the body though! Ha ha! Catch me if you can!
In search of inspiration…
I wasn’t looking forwards to the wiring, and I haven’t been looking forwards to the painting. I’ve done a bit of this before and the results were poor. Granted some of this was simply down to a lack of patience but I knew this time that I needed help. I hit Google+ hard and before I knew it the advice was flowing in thick and fast. Many thanks specifically to Gavin Scully and Jonathan Martin for your words of wisdom. I couldn’t have done this without you guys! But before we start high-fiving let me reveal that this hasn’t all gone according to plan. Let me explain…
The body was given an orange color and a clear coat.
An extra long locking clamp (e.g. a non-medical hemostat) was used to thread the wires through the body. The preamp cavity was narrow and deep, so this tool helped out tremendously.
I originally thought that the rod piezo would be tucked into the space at the back of the bridge. After some testing, this setup wasn’t working as well as I wanted it to. The weight of the wood and the bridge dampened the sound too much.
After putting the rod piezo right behind the string saddles, the sound was much more responsive.
The neck was attached with an oval jack plate. (This seems to be a signature feature of my electric instruments.) A strap peg was placed in the middle of the plate.
The battery compartment was installed in its place at the bottom.
The smaller preamp and the battery holder work together to make a great setup for this bass ukulele. There are no onboard volume or tone controls, but those things are easily controlled on the main amplifier.
This bass ukulele turned out great. I was worried about my color choices when I started out, but I think it looks awesome.
This little ukulele also produces nice sound. The Road Toad strings have a really nice feel to them, and they help make sweet music.
I met all of the goals that I had for this project. I now have a slick little instrument with great sound and looks to match. This project was a rousing success!
Check out the deep and rich sound that this little bass puts out.
To see more of my videos, subscribe to my YouTube channel (Circuits and Strings).
This is my second ‘how to’ for today and it was almost a ‘how not to’.
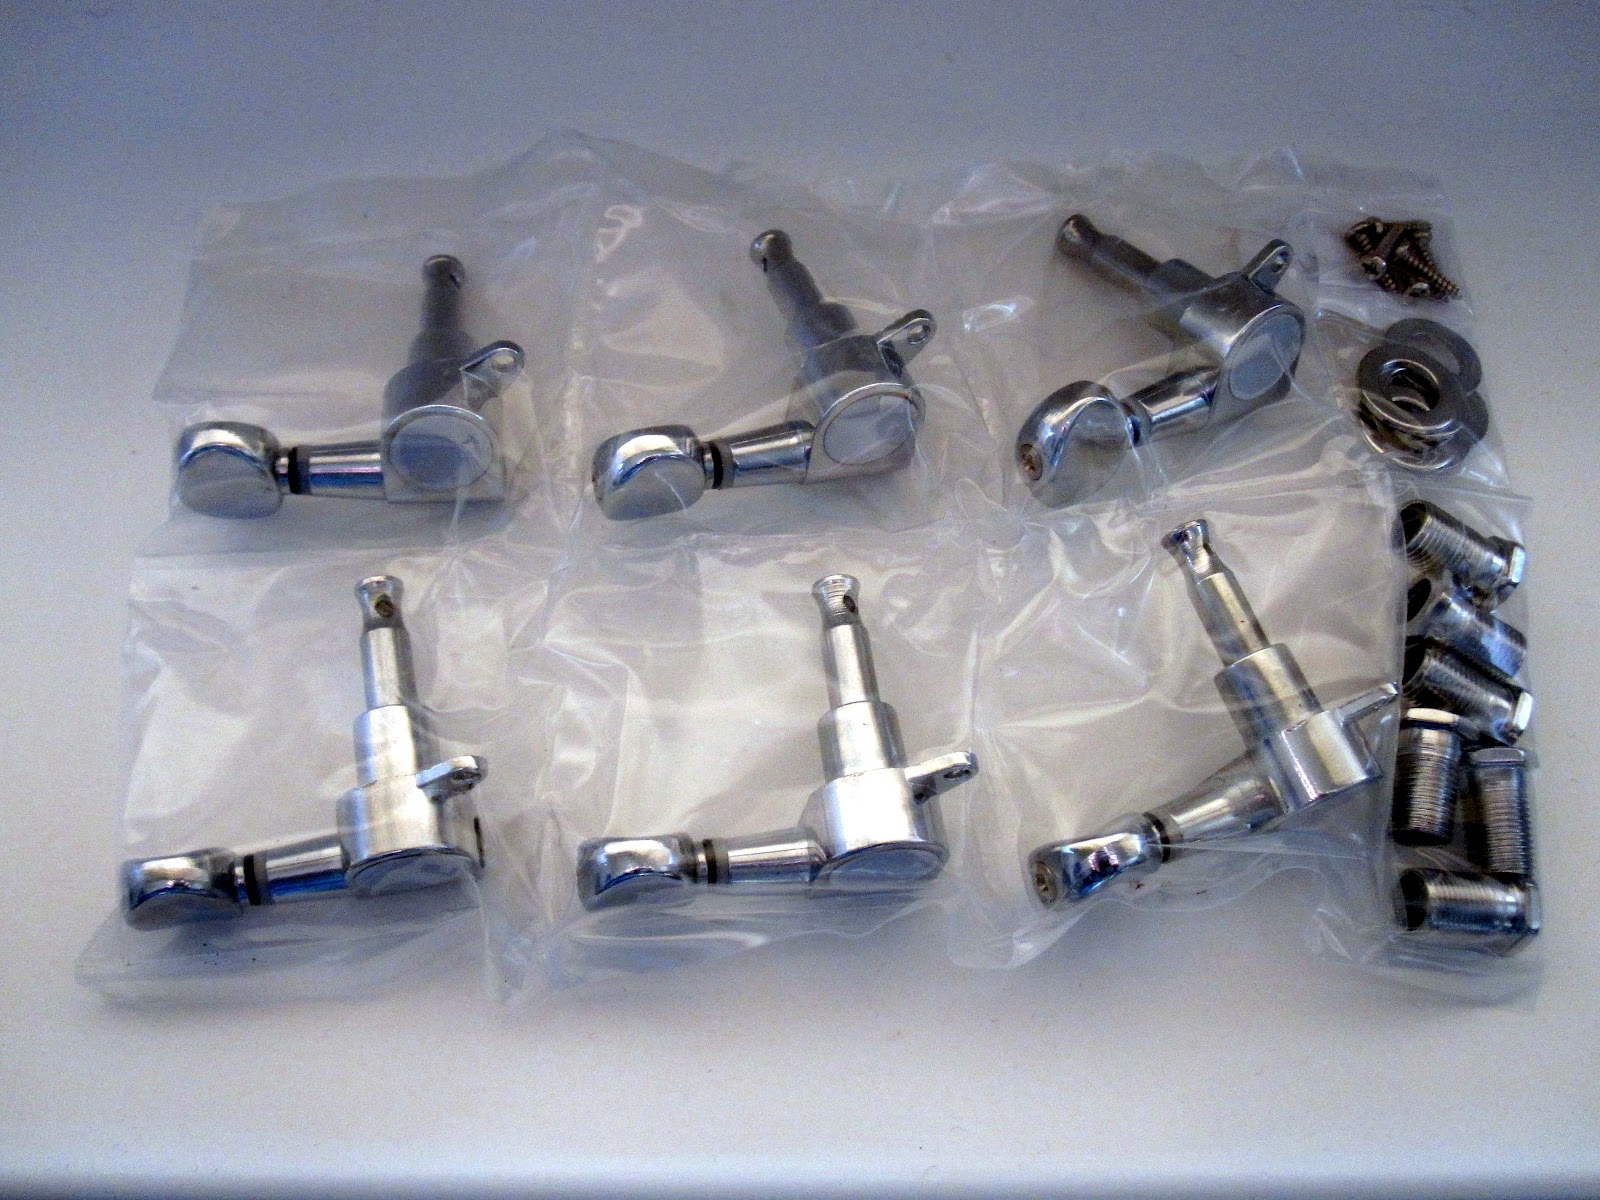
Machine Heads… Tuners… Gear Heads
I’m fitting these standard Strat-style tuners to my Electric Uke
For those of you with a worse memory than me, I remind you that earlier today I busted a scratch plate. I left you hanging with the promise of a post on how to fit the tuners. I’ve done that now and here’s how I did it…
I was reminded today about a promise I made quite a few months ago. I said I’d post a review of how my Stagg sounds now that I’ve got my piezo fitted. Well here it is…
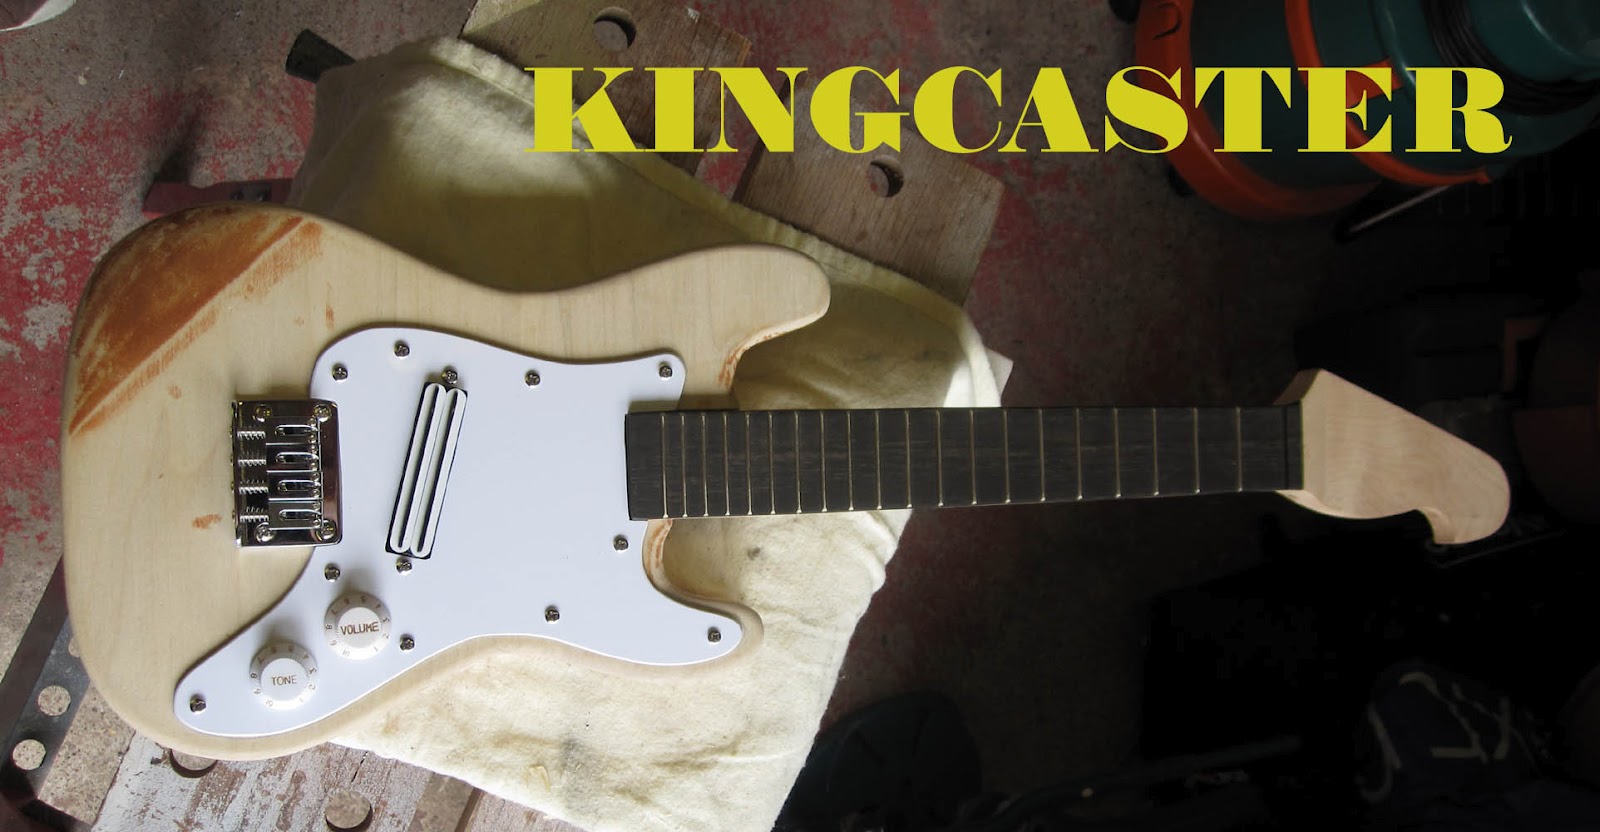
I’m back and I have another update on my electric ukulele build. Most of the shaping has been done and now I’m on to the fiddly bits. In my last post I battled with my demons and fitted the frets. This post is a whole lot more laid back… but this is no time to become complacent! Today I show you how I made the scratch plate.
In my last post I described how I put the finishing touches to my electric ukulele body. I also mentioned a few nerves about fitting the frets to the neck. I wouldn’t go as far as to say that I’ve been avoiding it, but I’ve certainly been waiting for the right time to do it! Okay, so I’ve been avoiding it. ;-P
I luv ukes… but not so much fitting frets…
It took a supportive push from Gavin MacMillan to make me finally take the plunge. He told me to “man up and get the frets on!” Thank you Gavin. I gone and blinkin’ done it… and here’s how I did it…
Time for an update on the Electric Ukulele Build. In my last post I talked about how I started to make the neck. You will remember that I left you on tenterhooks as I revealed that I’d controversially glued the fretboard to the neck prior to fitting the frets. I still haven’t mustered the courage to fit the frets but this doesn’t mean that I haven’t been busy… a lot’s happened since then. In this post I return to the body to apply some much needed finishing touches.