From wood to wood in 167 simple steps – King Uke shows you how!
I haven’t finished it, but I’ve done enough to give you a run down of what I’ve been up to. Tighten your seatbelts, this might just get a little hairy!
Oh yeah… my build has been christened “the Kingcaster”. I kind of like the sound of that!
First you can start by designing your own ukulele using sketchup , for demonstration purposes I used this design instead of a ukulele ( I am using google sketchup pro 8 )
(Some info on the pictures can be helpfull , click them to see them better)
Once you got your ukulele you, look at the top of your screen and try to find “camera” and click it , once you have done that you will see a V next to “perspective” you would have to change that to “parallel mode”
Once you have done that, return to “camera” and click ”standard views” and choose the view you would like to have printed ( top view, side view, bottom view….)
Next go to ”file” also on the top of the screen and click print .. this should appear.
Now look for the section “printing format” and you will see that “made to fit page” is on, and turn that off and on the right you see a “scales” section and you want to set “in sketchup” and “in print” both on 1 this way you will get a 1:1 scale
Then all there is left for is to hit ok and you will end up with something looking like this …… with this method you can get pretty accurate ukulele body and neck templates .
The body is made of ash. The neck was made with three pieces of maple. The headstock was scarf jointed to the neck and the fretboard was glued to the top. I got the specialized tuners and nut from https://www.largesound.com/buy/. They provide replacement parts for Ashbory Basses. The bridge is a knockoff “Hipshot A Style” bridge. This type of bridge allows for the mounting of the thick “Road Toad” strings.
I sealed and primed the body. I drilled a larger hole by the the bridge to allow a rod piezo pickup to be mounted by the back of the bridge.
With a drill and a chisel, I hollowed out a cavity for a 9V battery holder. This bass ukulele will have an active pre-amp to boost the low output of the piezo rod.
The neck was given a nitrocellulose lacquer finish after side markers were installed.
Next, the body will be given a beautiful orange finish. Once the color and clear coats have cured, it’ll get a good buffing and polish. Finally, my favorite steps will arrive. That is assembling and playing the instrument. There is something almost magical about the first tune on a brand new instrument.
After waiting for the clear coat to cure, the time came to wet sand, apply the polishing compound, and polish the body. I used 1000 grit sandpaper to wet sand the body. I then used a rag to apply “fine” and then “swirl remover” polishing compound to the finish. “Meguiar’s Mirror Glaze #7” is what I used to give the body a final polish. It’s a car glaze, but I’ve seen it mentioned on a lot of guitar forums as a guitar polish. It’s worked well so far.
I tweaked a few things to adjust for the higher frequencies of a electric ukulele. 250K ohm potentiometers were used instead of the 500K ones. A 0.020 microfarad capacitor was used instead of the .047 microfarad one. In addition, a 0.001 microfarad capactor was added between the center and right lugs. (Okay, so I “tweaked” everything.)
Now, the Telecaster Ukulele is ready to assemble and then play! In this video, I give a demonstration of the uke in action, and show it being assembled in real time (I work fast).
It’s been fun making this ukulele and sharing the details. It was a lot of work, but now I have a custom instrument that plays beautifully and looks great.
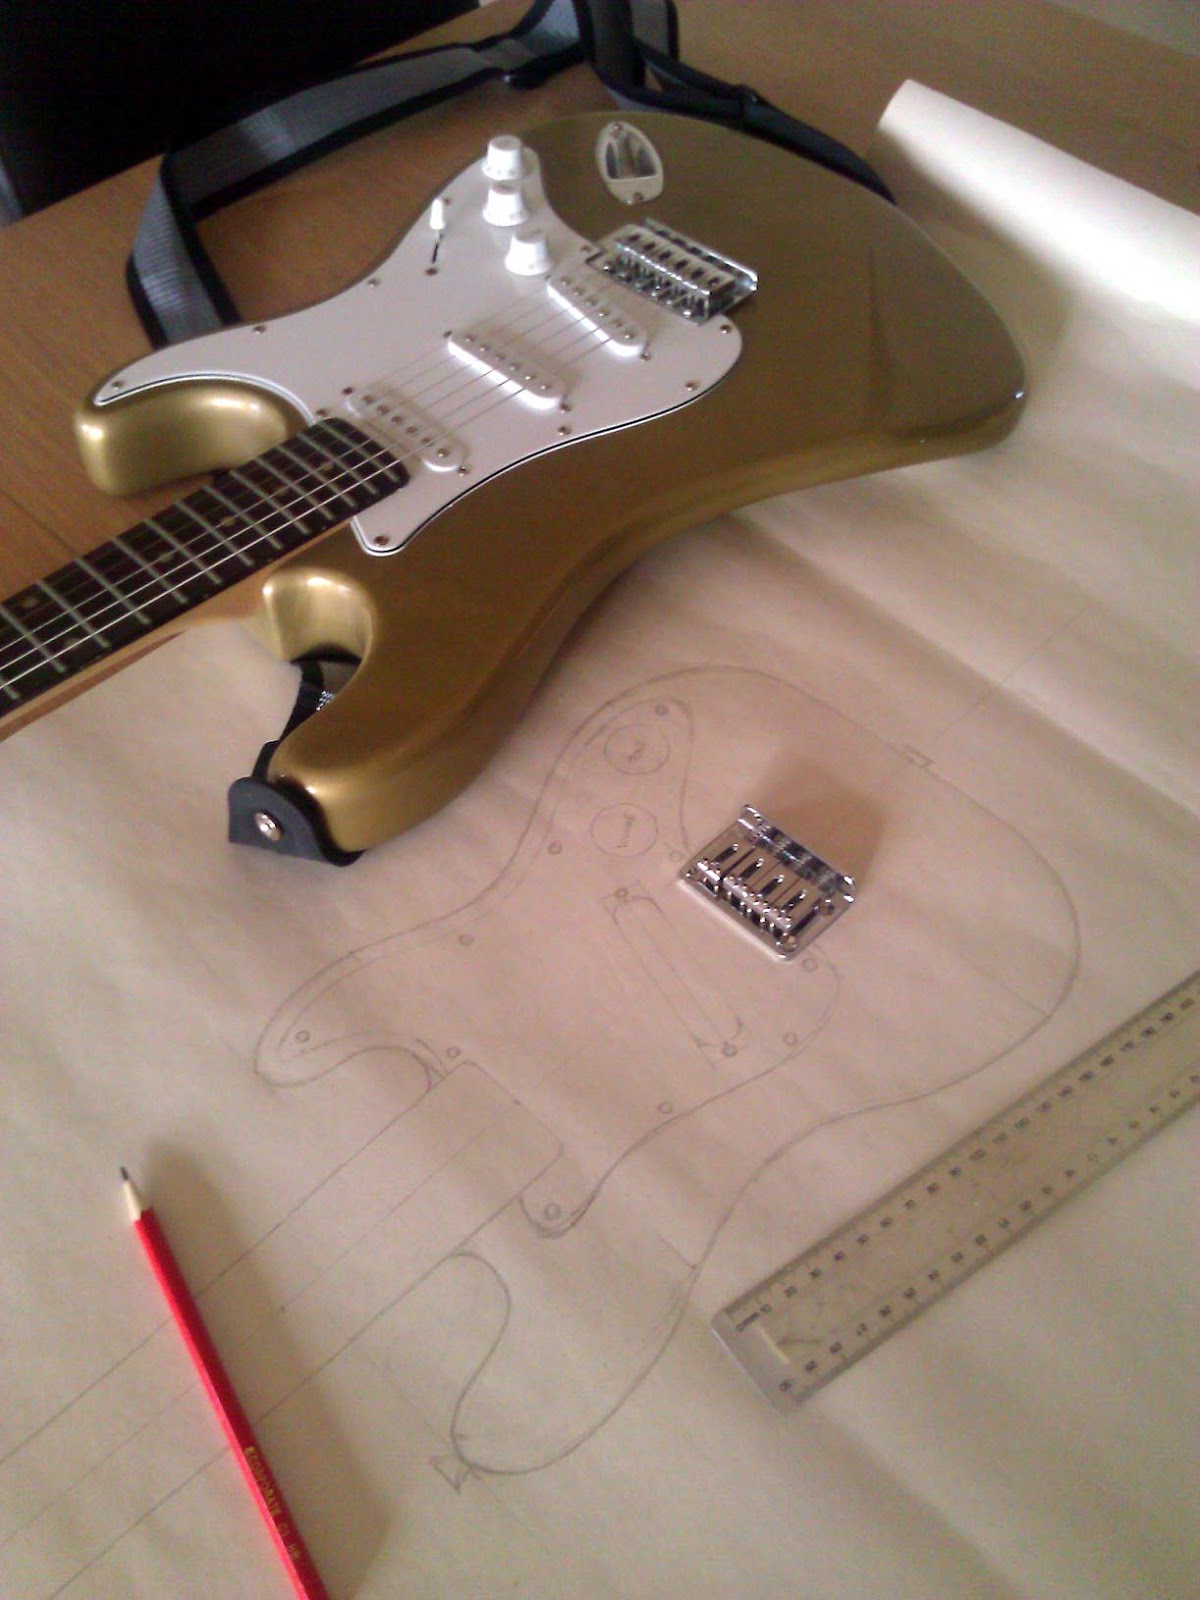
I’m building an Electric Ukulele and I promised to keep you up-to-date with progress. Today’s post covers the work I’ve done to create a pattern for my build.
Sometimes the desire to ROCK is tempered by a lack of tools. To make a regular solid body electric ukulele, you need a scroll saw (or a band saw) and a router along with some other basic tools. However, a hollow enclosure can be used for the body, which eliminates the need to cut and rout a wooden body.
For my ukulele, I used an ammo box that I purchased at an army surplus store. This same kind of thing could be done with any type of sturdy wood, metal, or plastic box.
The neck was made with two pieces of mahogany scarf jointed together. Less expensive and more readily available wood could also be used. In fact, other types of wood would probably be more congruent with the “DIY spirit”.
In keeping with the ammunition theme, many of the hardware appointments were made with spent bullet shells. One the most difficult parts of this build was cutting a hole in the thick metal box for the single coil pickup. I used a hacksaw blade and a file to do this. A jig saw would have been much easier.
The bridge was made with a 30.06 shell. A shotgun shell top serves as the volume knob.
Back in the day, when electric ukulele land was just a little acoustic, they used to talk about ’15 minutes of fame’. These days, it is more like 15 frames, but… we will take it. 15 frames is better than nothing.
So … this video is a mild parody of what it would be like if google put adverts in ‘google glass’. You will note that ‘Electric ukulele land’ turns up in the google+ search around about the 0:36 mark in this video.
You may also note that 521,062 (at the time of writing) people have watched this video!!
Colliers Wood 3rd Ukulele Festival is on April 21st, and it should be a corker. I went last year and totally enjoyed it. I hope I can interview some of the players this year!
I’m going to build this bloody electric ukulele if it kills me! I’m serious about this! And if you didn’t believe me, here’s the proof… I’ve just bought a router. I opted for a budget Draper 1200W Router Kit. I know nothing about routers, so this is a real journey of discovery for me. There’s a video at the bottom of me unboxing my new toy and here are a load of pictures of me checking it out and putting it together.
Draper 1200W Router Kit
Stock number 90088; Part number PT1201VK
Some people buy iPad3’s and unbox them in video’s on you tube so that other brand fanboys can feel what it is like to open new tech without having to shell out hundreds of pounds. We here at ukeland have all been lusting after power tools for building electric ukes. Resident tool teaser ‘King Uke’ and co have made us a router unboxing video. We love it. WANT ONE!